2020-01-30
Why use MkDocs?
I decided to set up this website using MkDocs, a system I have not used before.
It is similar to Sphinx Docs in that it can render text files to static html files templated for documentation. Unlike Sphinx, MkDocs speaks Markdown by default.
I have created websites from scratch, both static and dynamic, but I thought MkDocs would allow me to write documentation more quickly
without focusing as much on markup. The server launched by mkdocs serve also refreshes the docs each time a file changes, so changes are rendered in the browser on save without manually refreshing the page.
It appears custom javascript and html can be included since the MkDocs parser ignores it. This allows us to include arbitrary HTML content. As a tasteless example, here is a tag not often seen since the 1990s:
<marquee>This is a test of a pure-HTML element...</marquee>
Which does output correctly! Behold:
MkDocs installation via conda
MkDocs is written in Python, and I chose to install it to my machine within an isolated conda environment called ps70_env.
I chose conda to encapsulate PS70-related software using conda because:
- conda can handle binary dependencies (i.e. not just Python)
- the environment keeps everything isolated from the rest of my system
- conda has a rich package ecosystem; beyond the
defaultschannel, many things can be found inconda-forgechannel (and others) - the environment can be easily reproduced by importing an
environment.ymlfile of the environment state - I am already familiar with conda from my involvement with the Bioconda channel.
After installing Miniconda, I created my environment via:
conda create -n ps70_env python=3 mkdocs
And activated it via:
conda activate -n ps70_env
Once active, I installed the Material theme:
pip install mkdocs-material
MkDocs commands
MkDocs exposes the following commands:
mkdocs new [dir-name]- Create a new project.mkdocs serve- Start the live-reloading docs server.mkdocs build- Build the documentation site.mkdocs help- Print this help message.
I enabled the Material theme by adding it to my mkdocs.yml file as directed in the docs,
and started the live preview server (mkdocs serve), accessible to my local machine at http://127.0.0.1:8000/.
MkDocs theme customization
As styled by Material, the bulleted lists had a little too much space for my liking so I added a custom stylesheet, customizations.css, to override
default list styling. This was added to the stylesheets/ subdirectory and to the mkdocs.yml config file as a value of the extra_css: key.
To find the relevant CSS style to change, I right-clicked on a list element (on this page) and inspected it using the DevTools built in to Google Chrome:
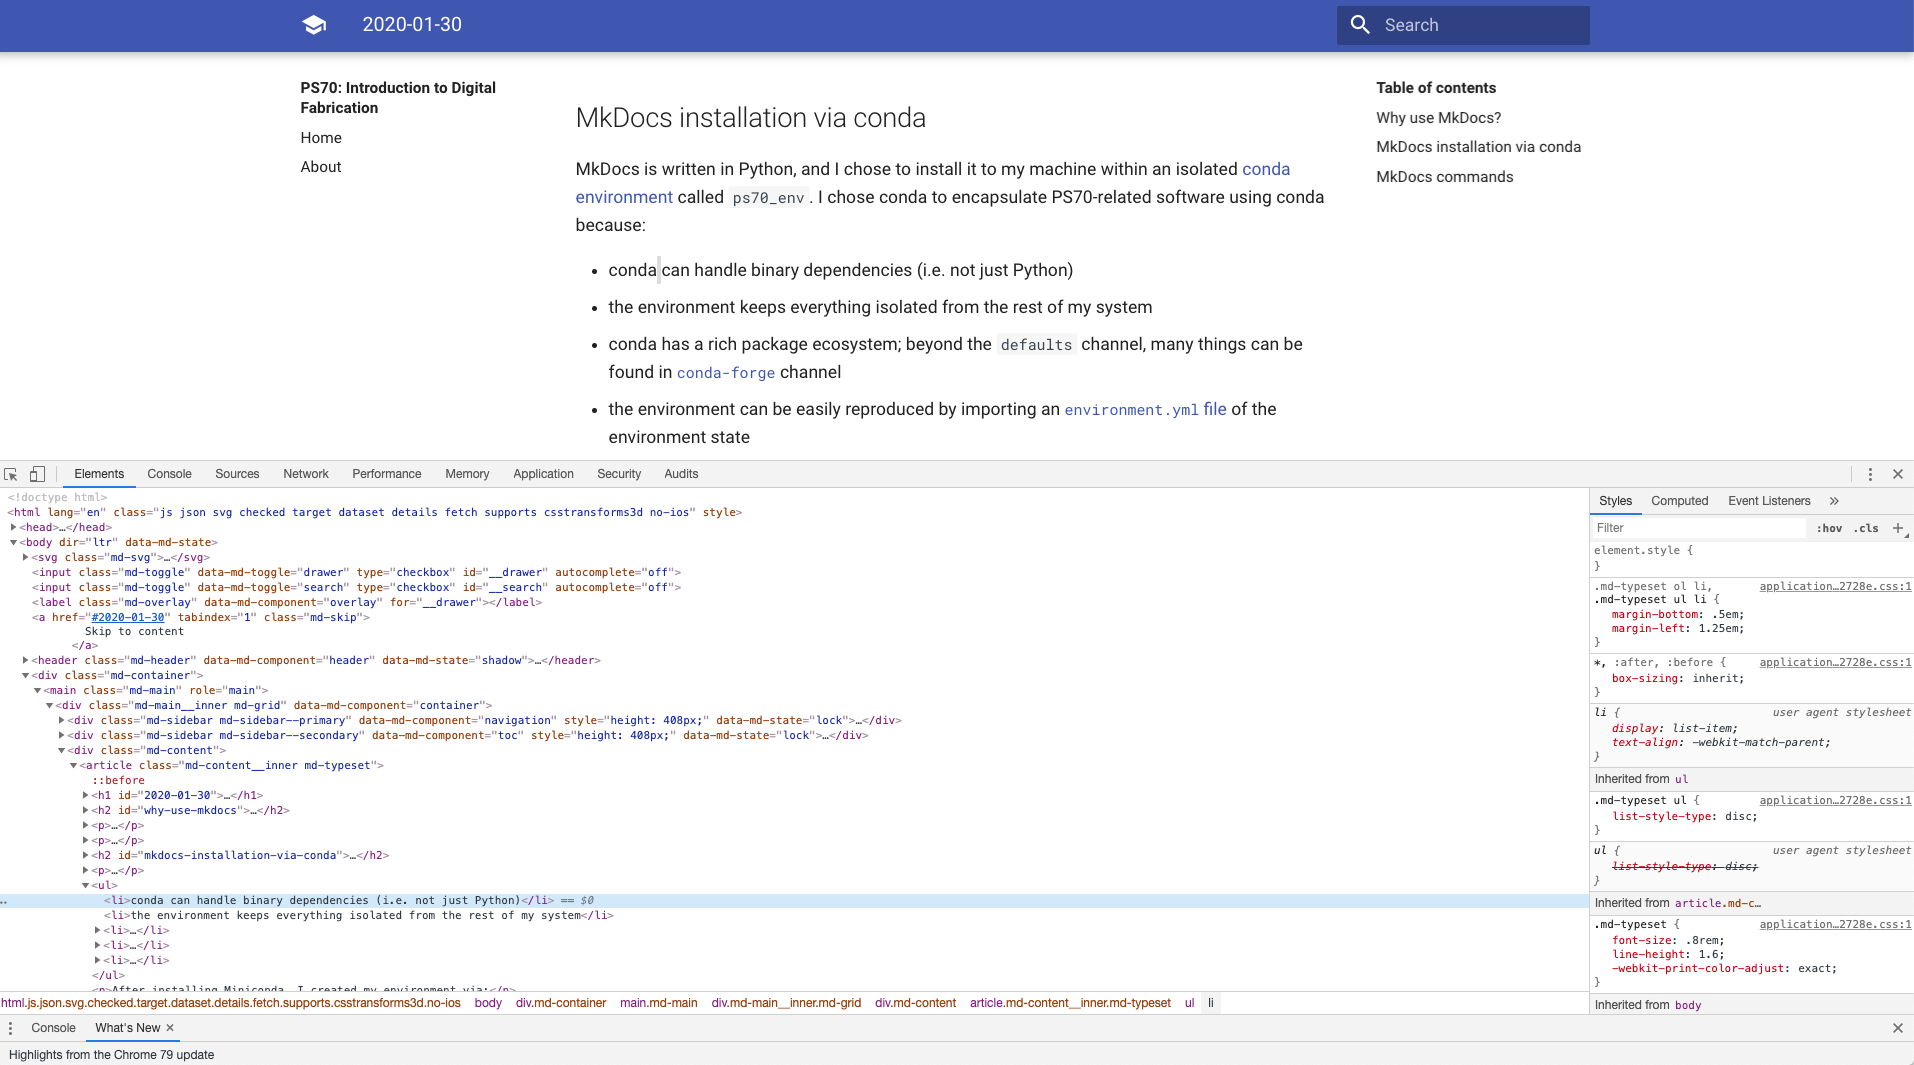
The relevant style rules were applied to the following selectors:
.md-typeset ol li, .md-typeset ul li {
    margin-bottom: 0.5em;
    margin-left: 1.25em;
}
In my customizations.css file, the override was straightforward:
.md-typeset ol li, .md-typeset ul li {
    margin-bottom: 0em;
}
Note: This only works because the extra css files used my MkDocs are processed after ones built in to themes. If custom css rules were applied first, I'd have to add the suffix "!important" to the 0em rule to force the override.
Images can be included via the standard Markdown syntax once copied to a subdirectory of docs/; for example the screenshot above was included via:

The documentation was then rendered to html and deployed to GitHub Pages and the gh-pages branch of this repository:
mkdocs gh-deploy
This makes the documentation available at https://tomkinsc.github.io/harvard-ps70/.