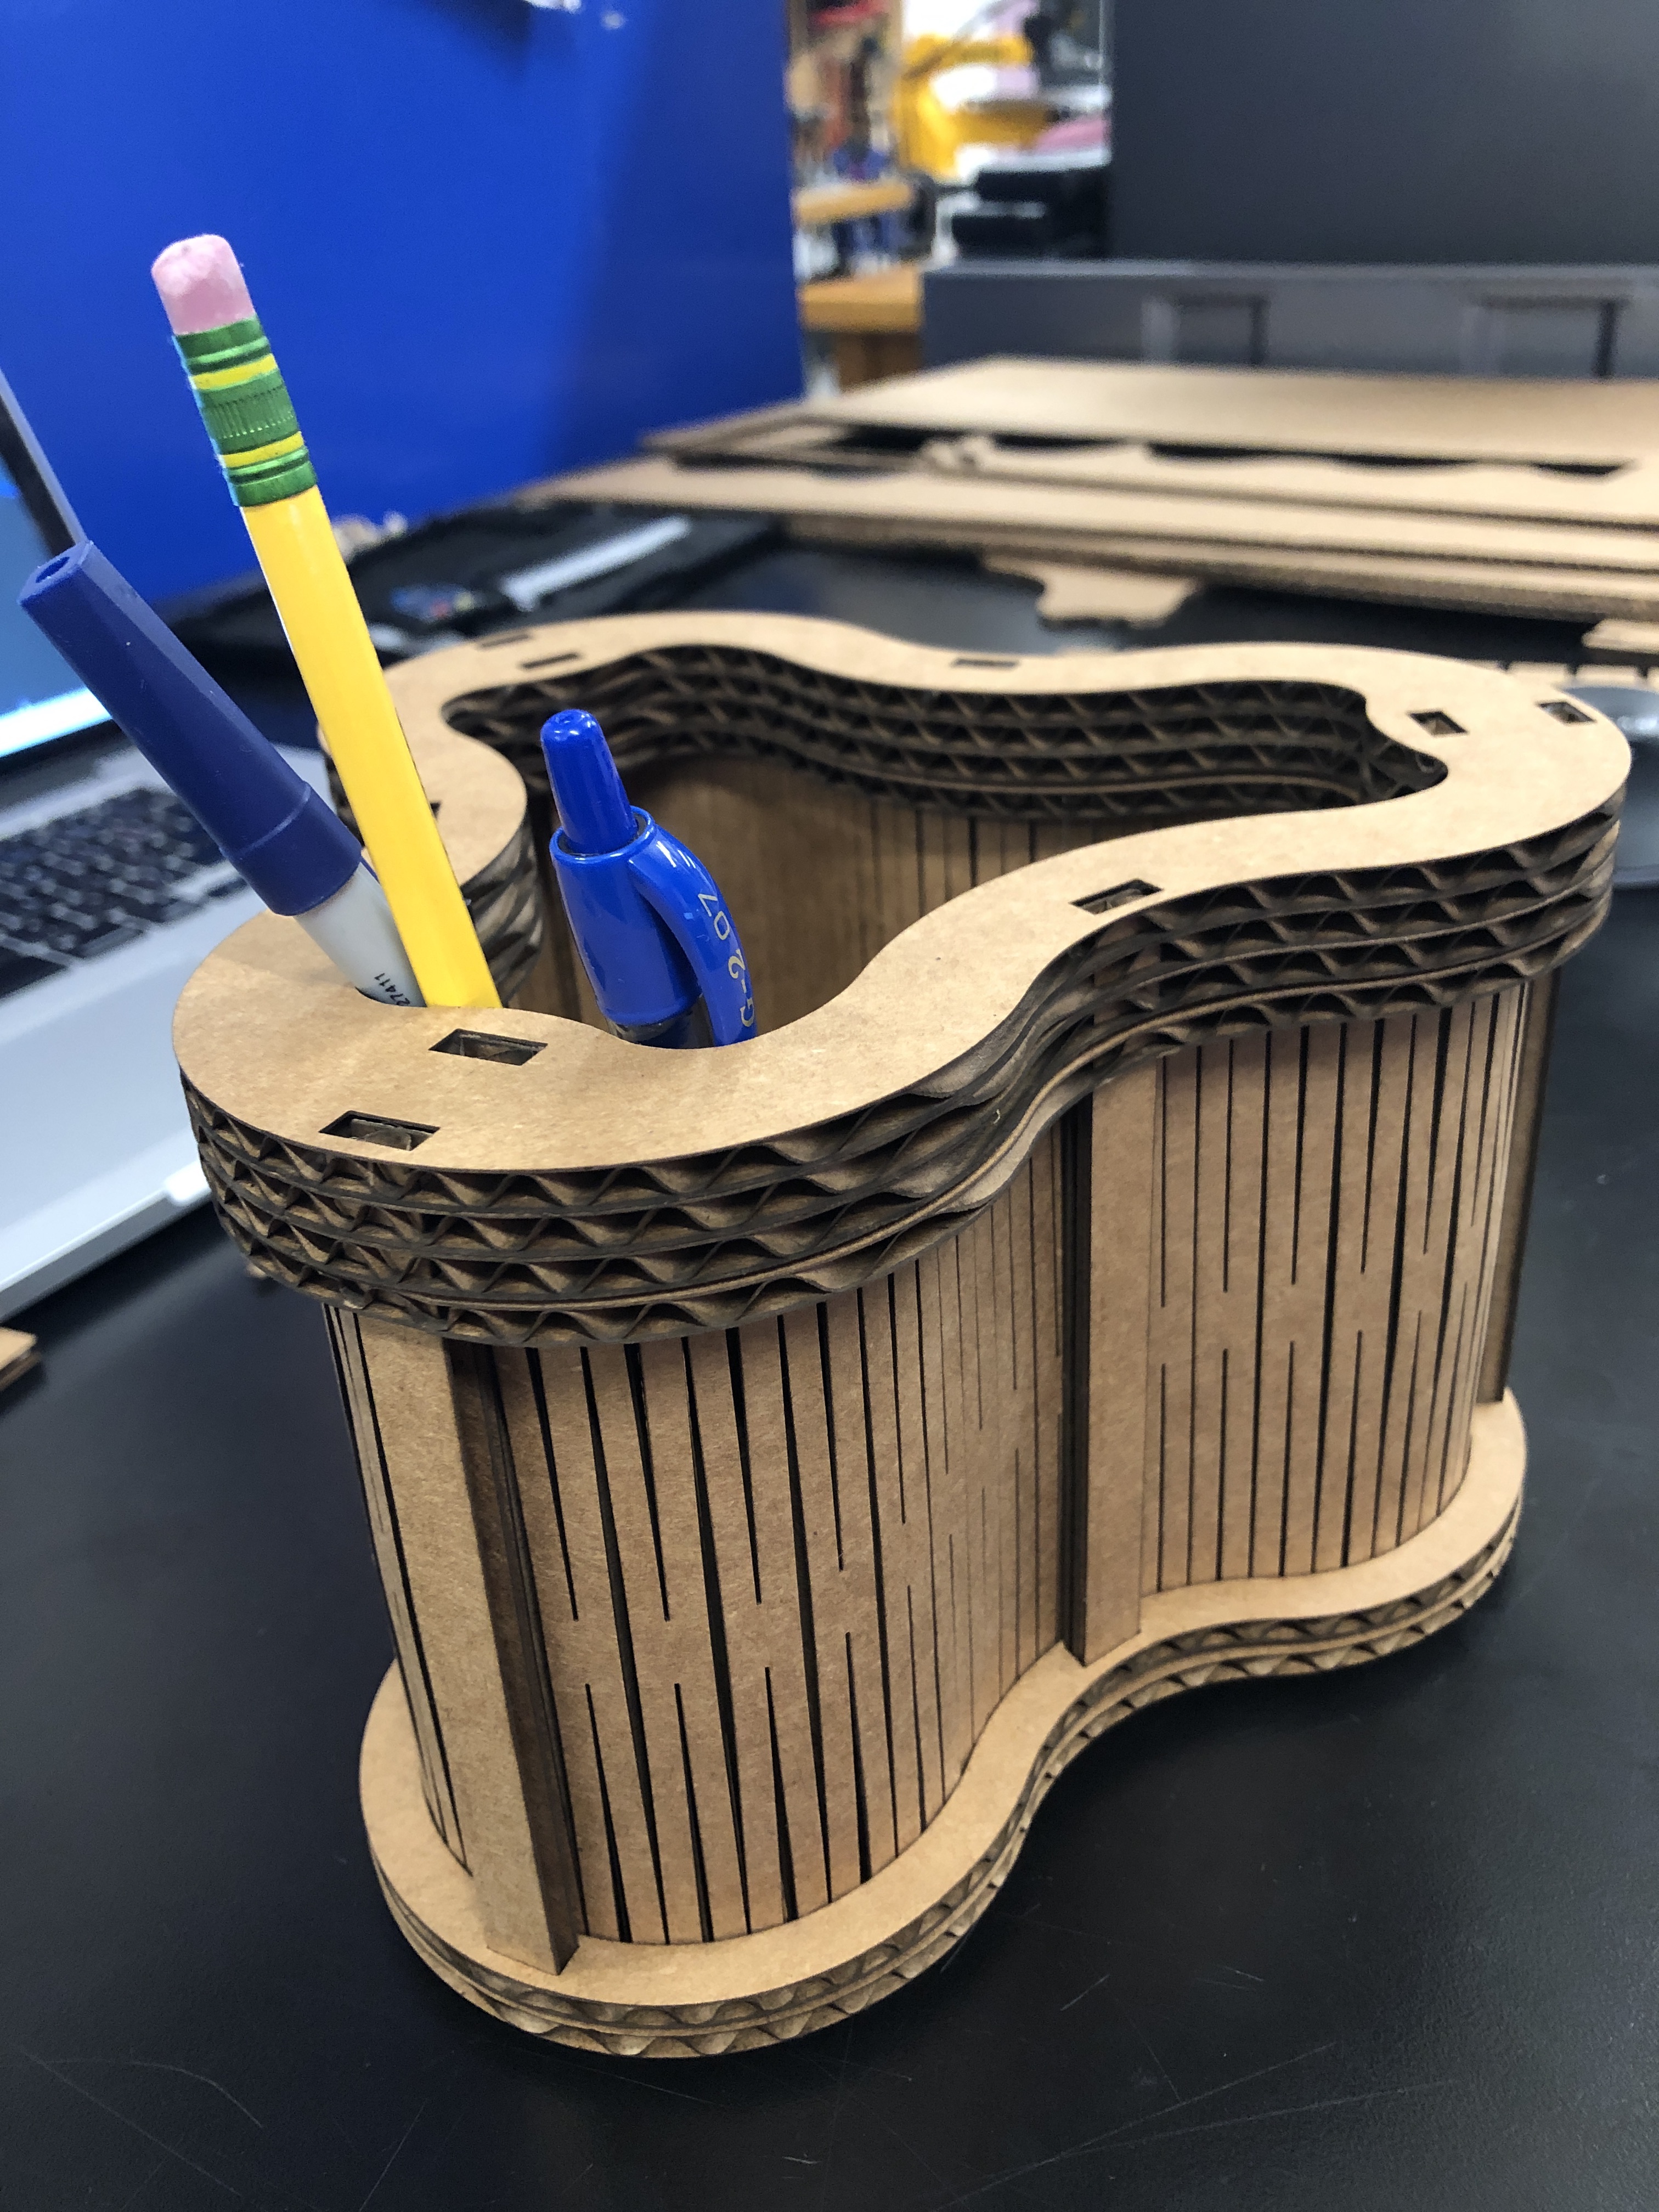
Laser-cut press-fit pencil cup
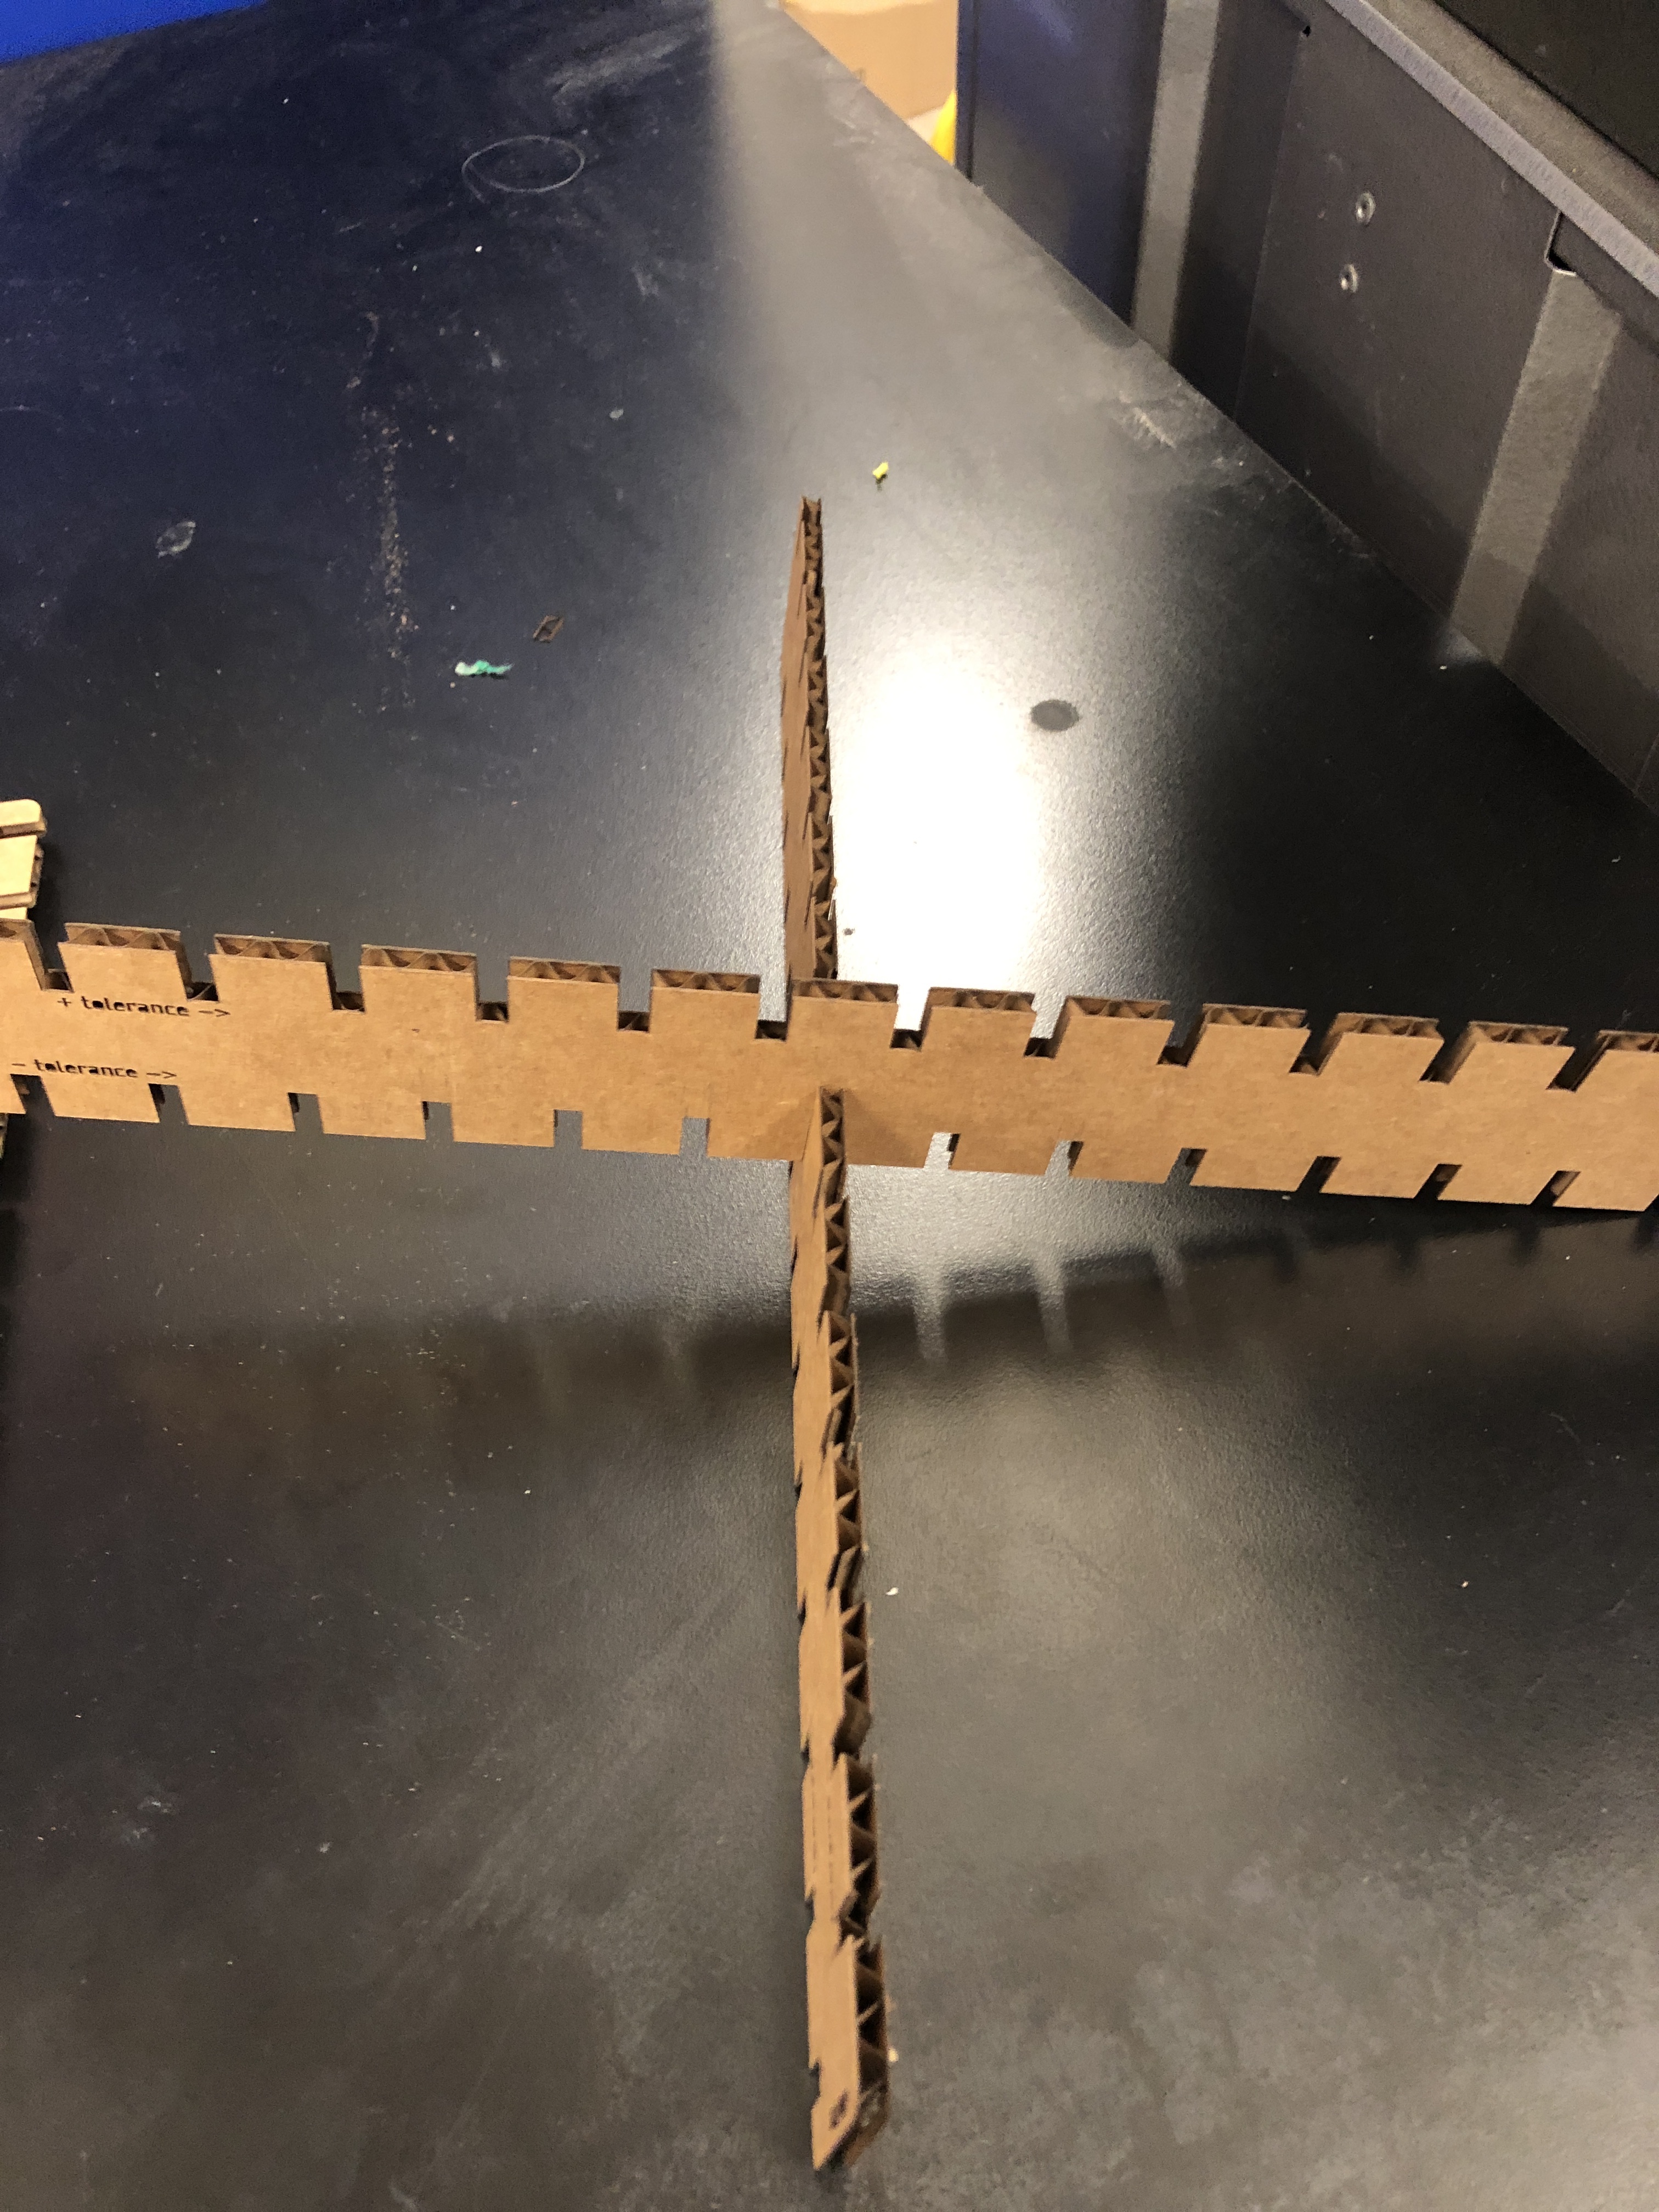
Tolerance gauge for press-fit parts
In order to determine tolerances for press-fit parts I created a gauge with a series of notches of increasing and decreasing tolerance centered on empirically measured material thickness. The model is parametric such that the material thickness and tolerance step size can be adjusted. This was accomplished by drawing a box to represent the total gauge then creating a rectangular array of lines down the length of the gauge from each edge. These lines served as the center marks for each notch. The notch width was created as a half-offset of the material thickness plus an integer multiple of tolerance to add or subtract to each notch. The edge was then trimmed.
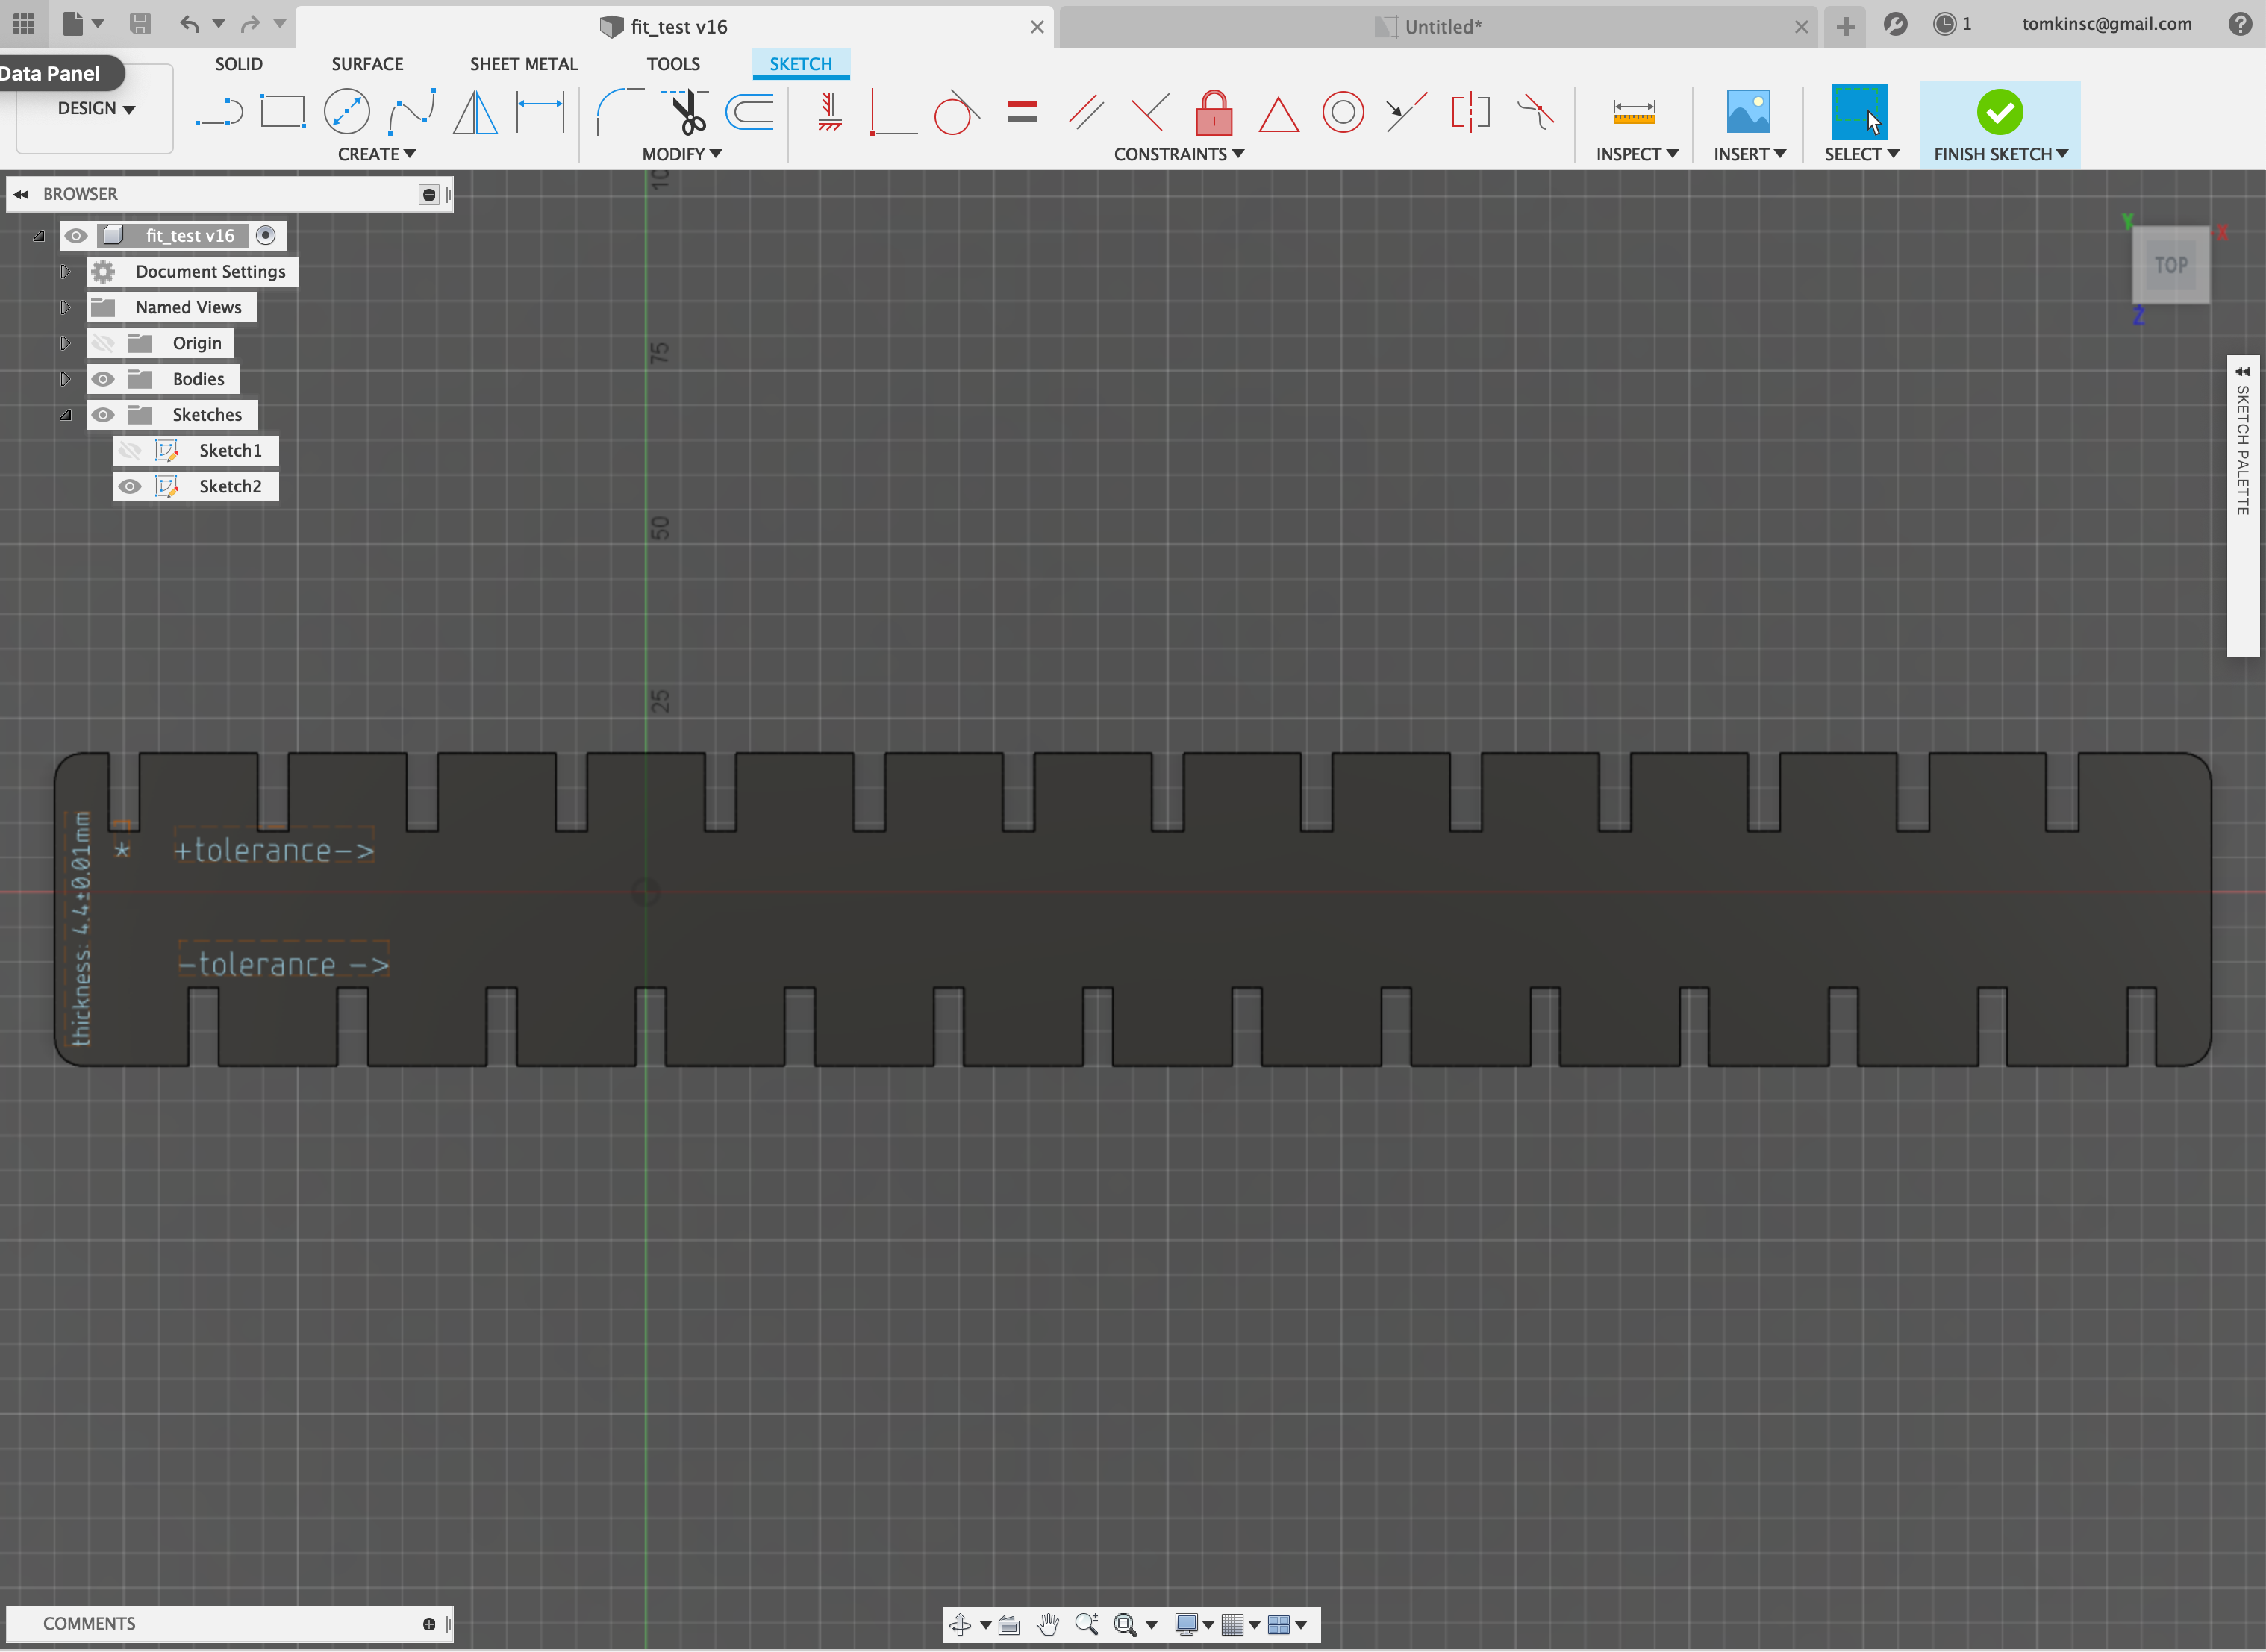
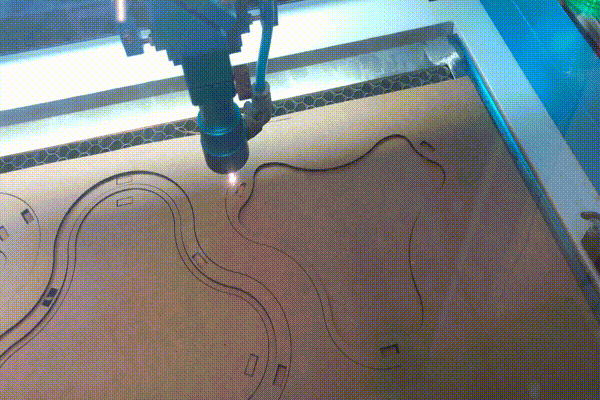
To prepare the file for laser cutting I needed to export a 2D dxf from the sketch. This can be accomplished by right clicking on the starting sketch and selecting "Save as DXF," however this includes construction lines in the resulting DXF. In order to exclude construction lines I extruded the sketch and made a new sketch from the front face. To that I added text labels to indicate the dimensions and change of tolerance. In order for text to be exported as part of a dxf by Fusion 360, must first be converted to lines by right clicking and selecting "Explode Text."
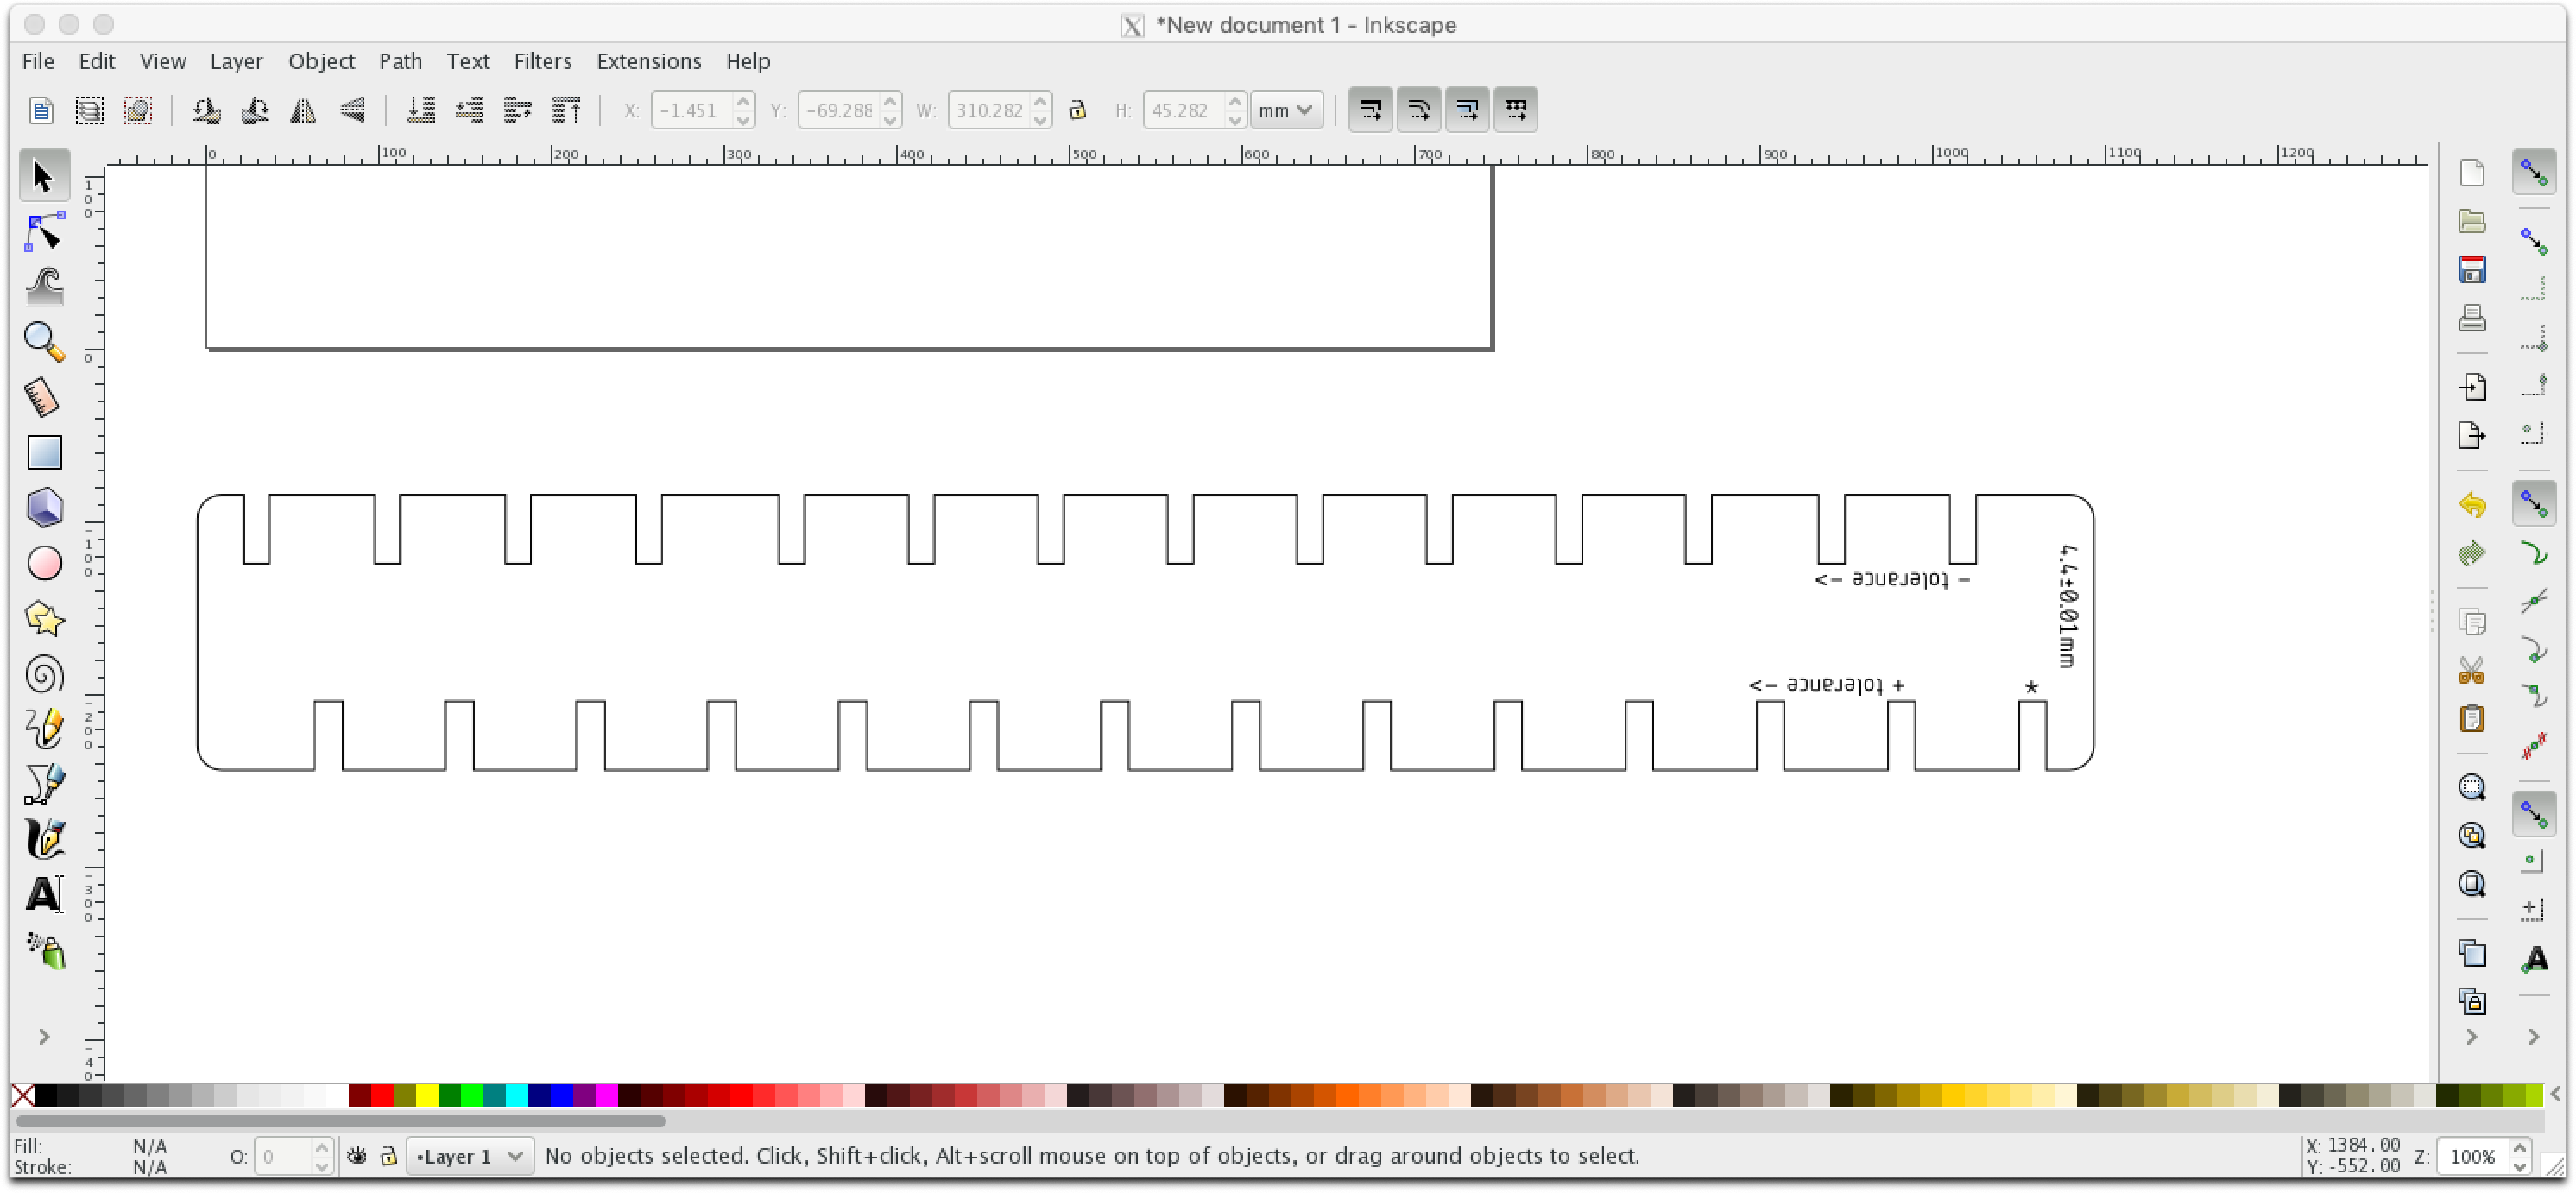
To test that the DXF exported correctly I imported it into Inkscape. The lines and scale appeared correct however, curiously, the DXF was mirrored relative to how the DXF was displayed in Fusion 360. That should be fine in for this case since all lines are cut lines extending fully through the material.
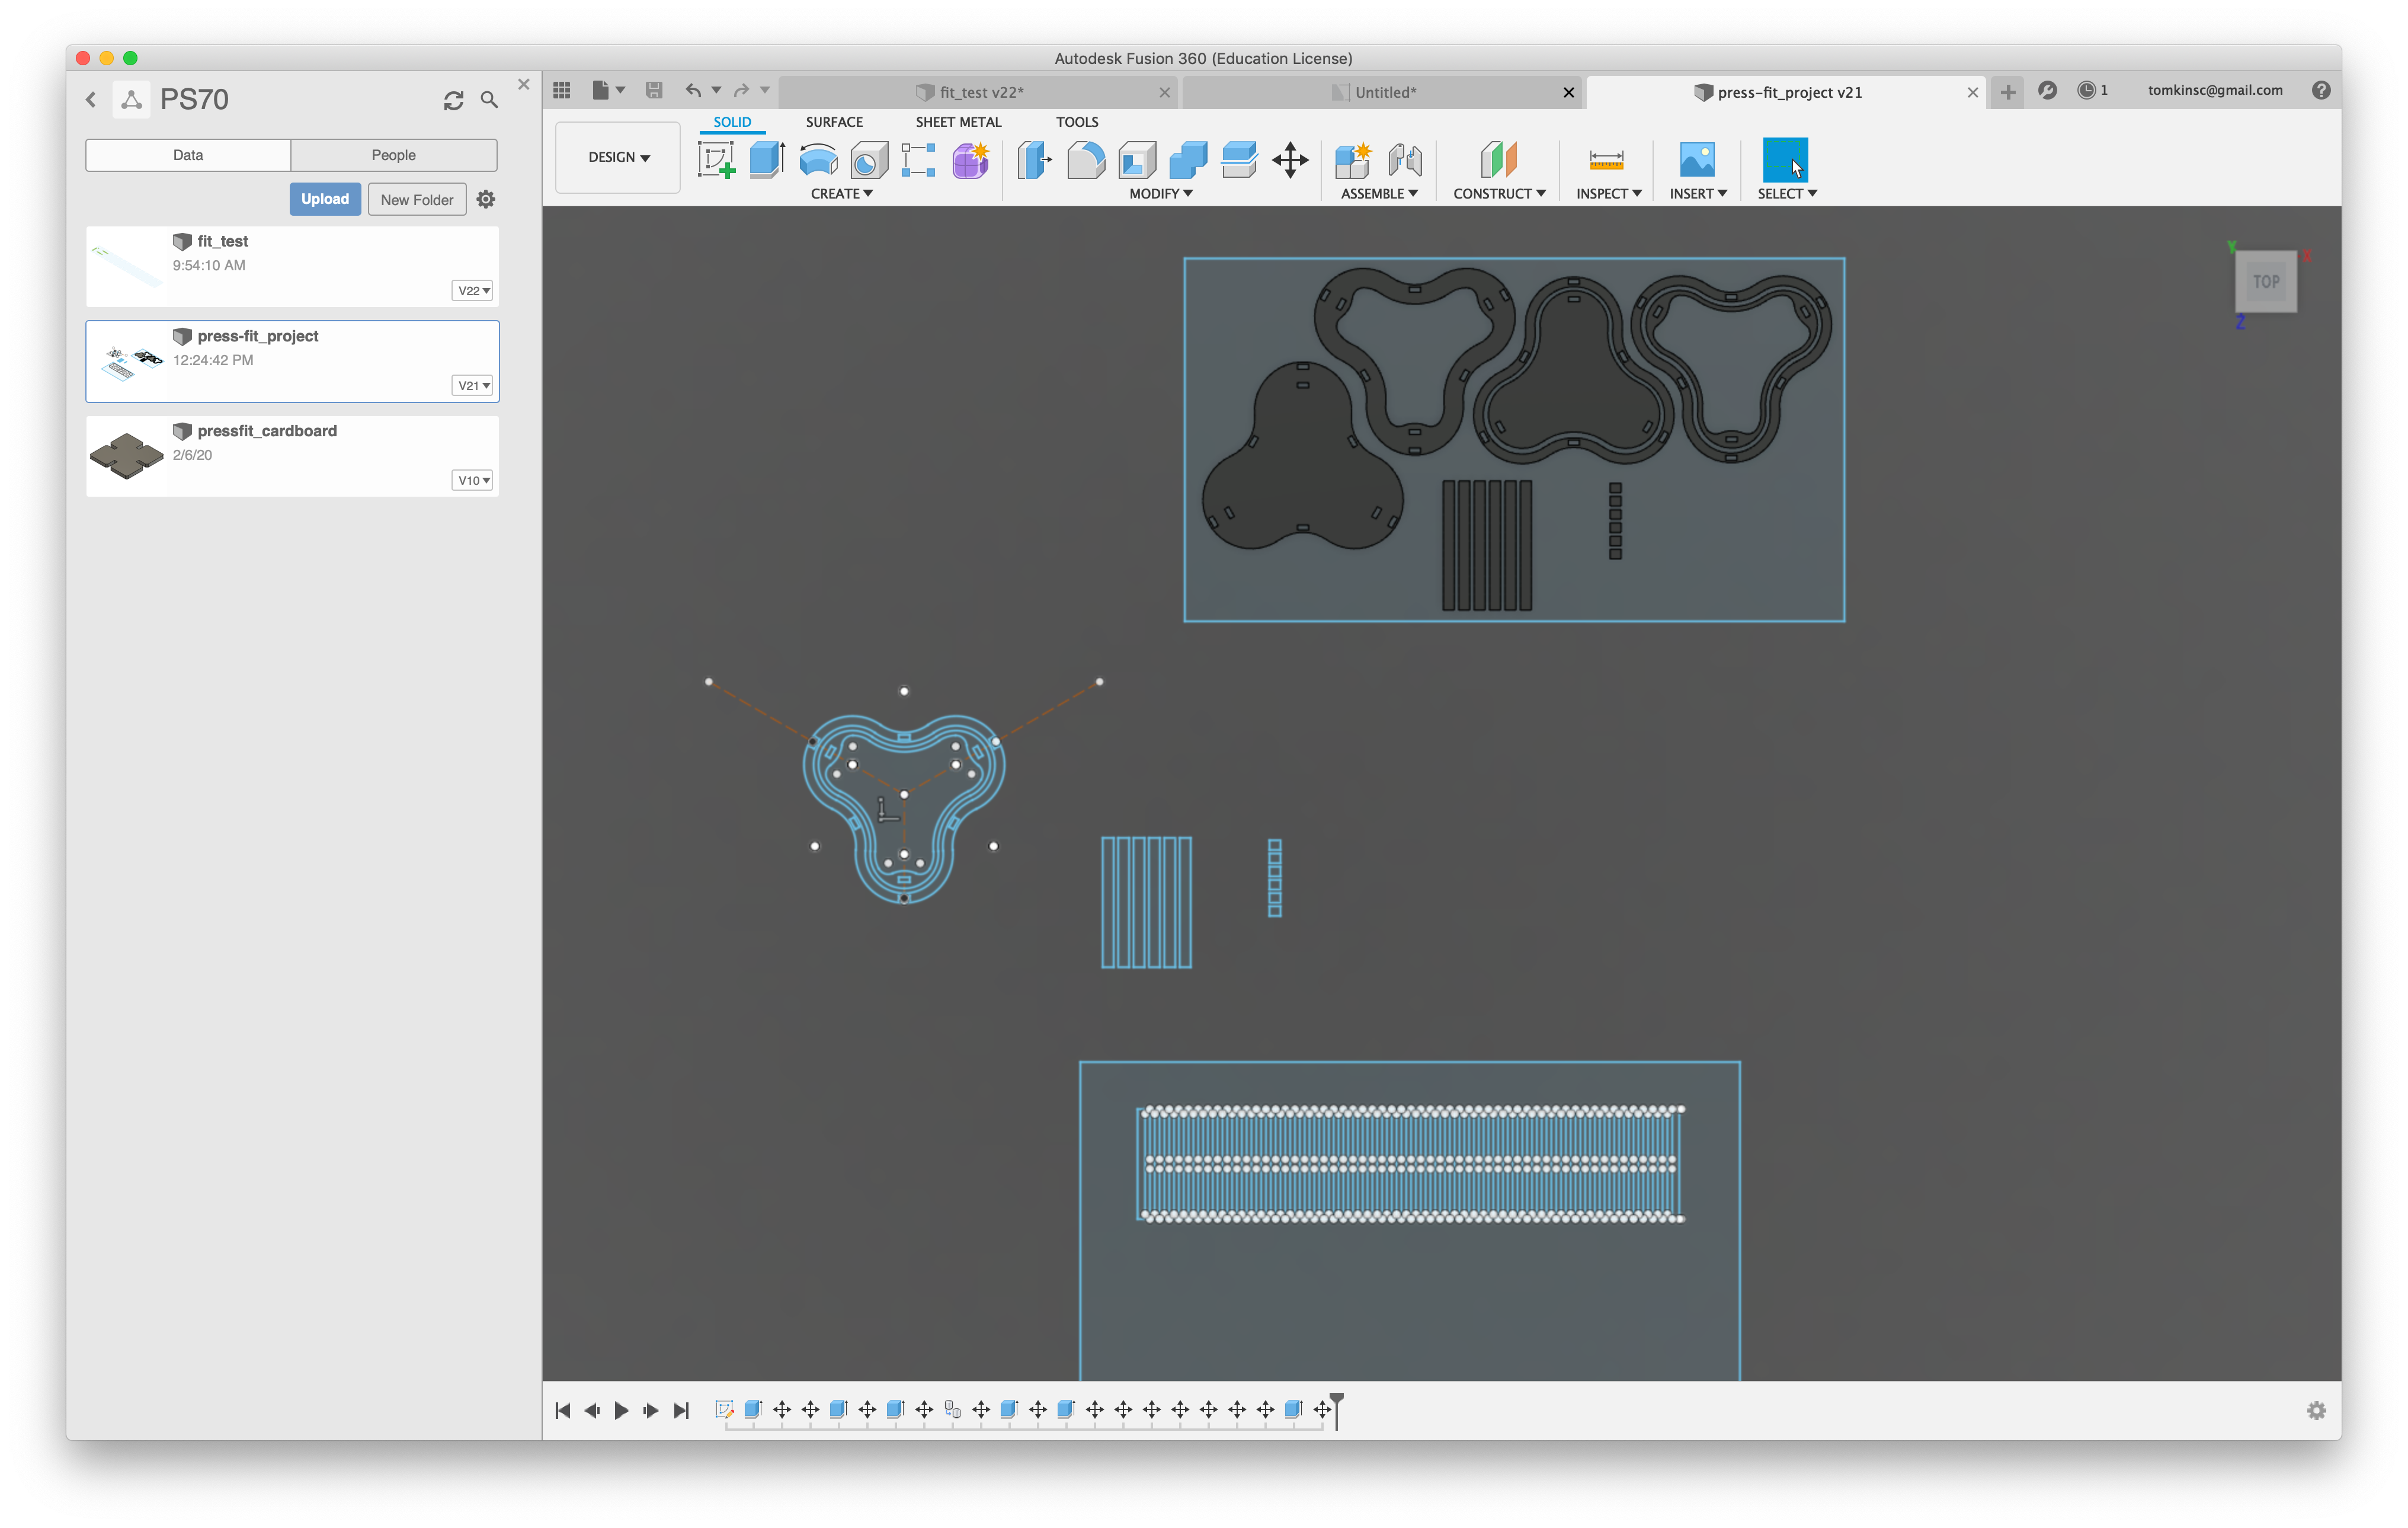
The resulting Fusion 360 design file is available here.
The cardboard stock was measured as having a thickness of approximately 4.3-4.4mm. On the fit gauge centered around 4.4mm, the fit was only acceptable at the narrowest notch which corresponds to a width of 4.26mm. A redesigned test stick centered around this value with 0.02mm steps in tolerance found a sweet spot at 4.12mm width.
Press-fit
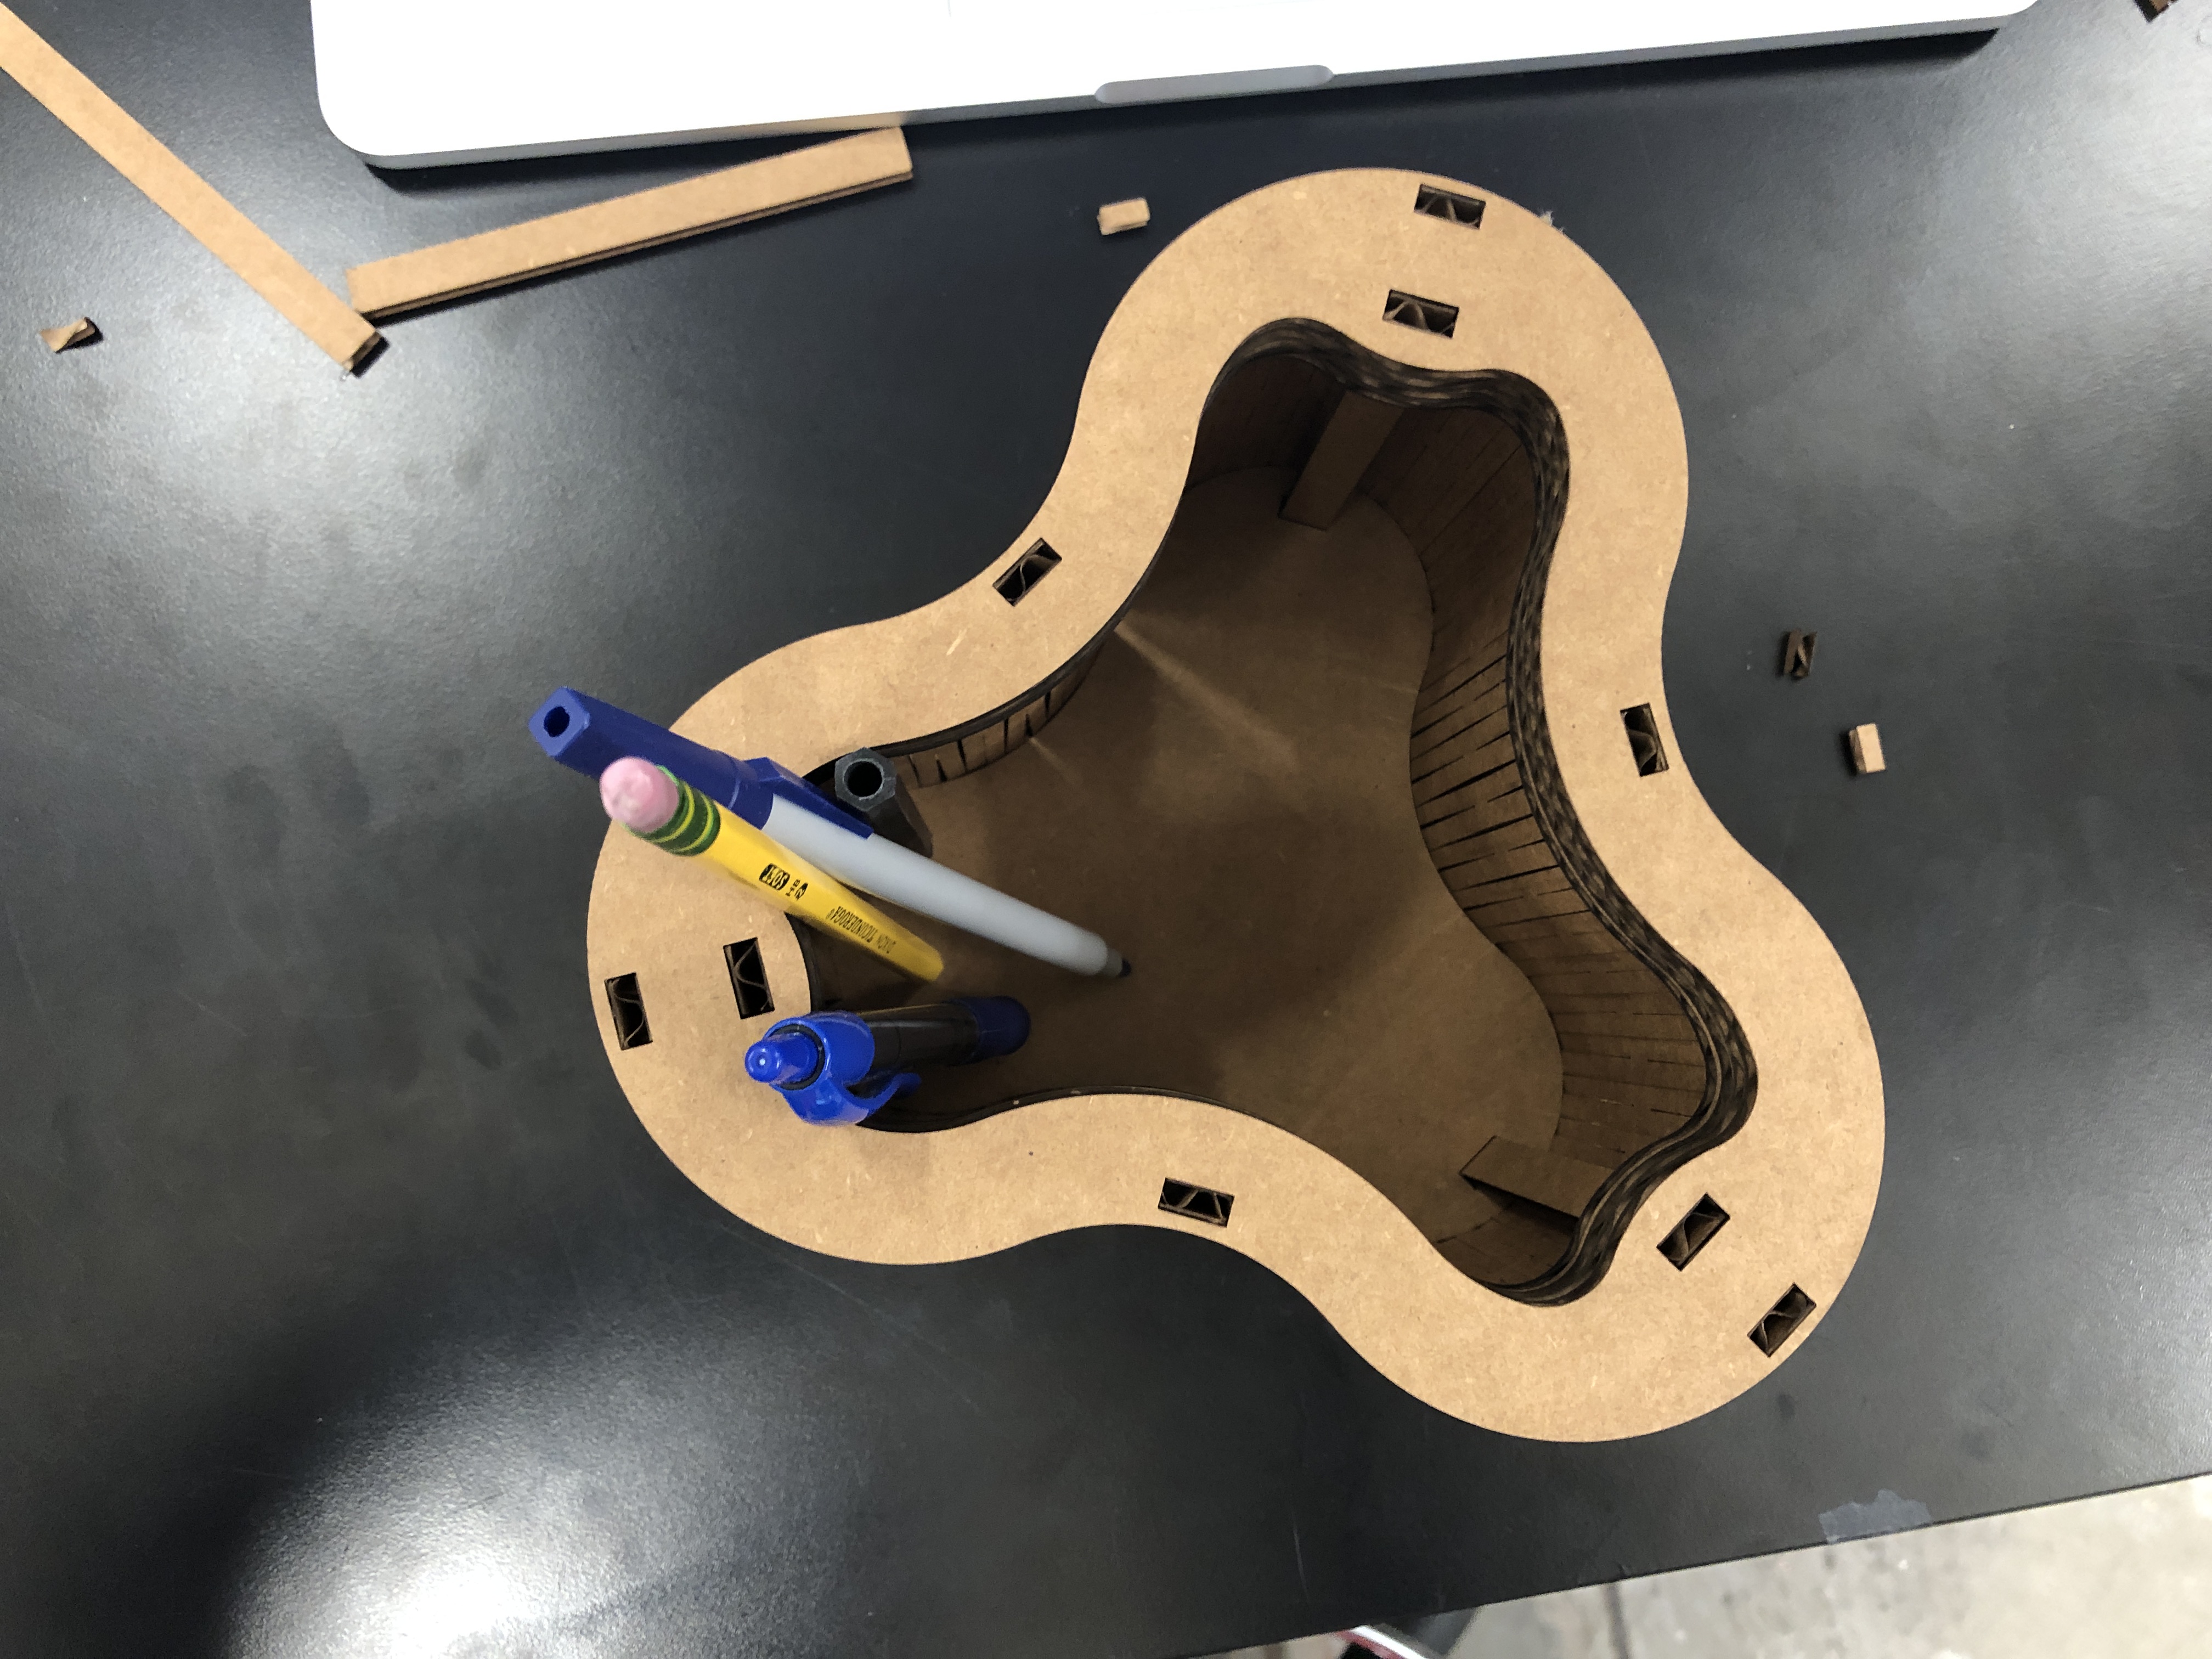
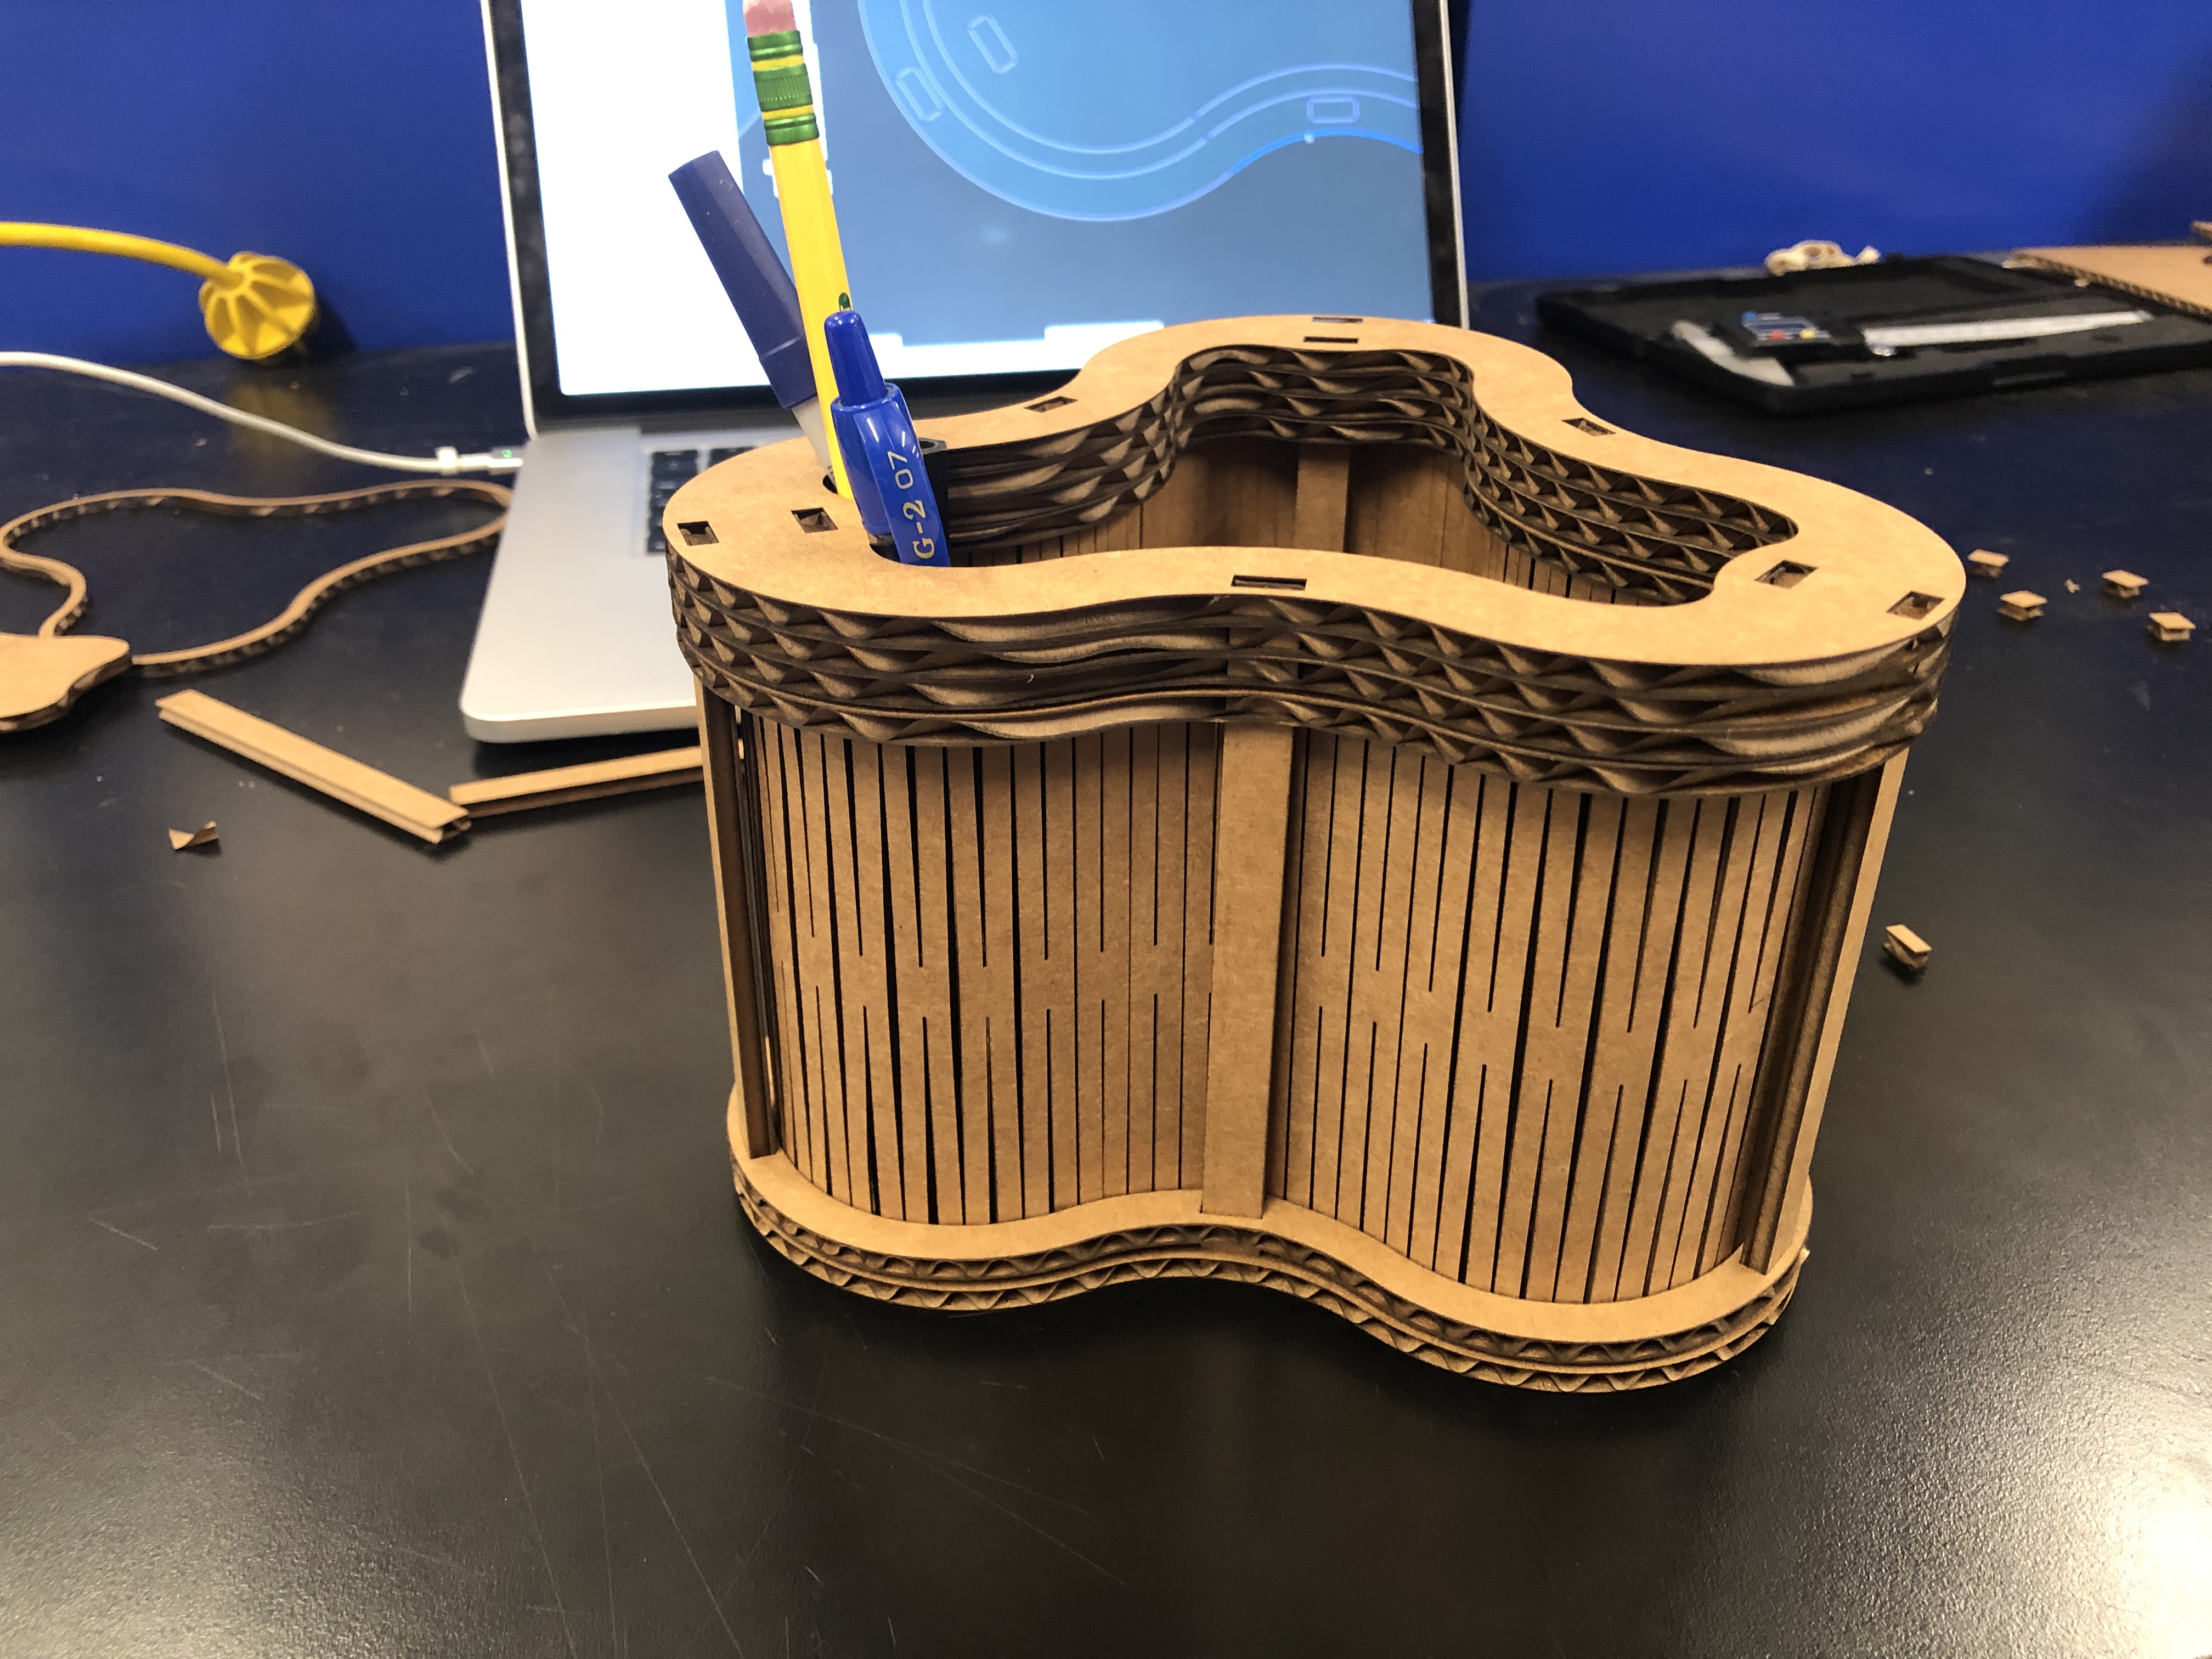
For this week's assignment we were tasked with making a press-fit construction kit. I decided to make a pencil cup. I wanted to try making sidewalls with living hinges, so the design is based on that idea: a long strip of cardboard is entrained within a race of other cardboard parts held together with press-fit joints. The living hinge was designed without much theory; it consists of alternating lines spaced out by a distance equivalent to the material thickness, with every other line interrupted by a solid break of twice the material thickness. To get the length correct I selected the inner (shorter) edge of the race and inspected the elements using Fusion to find the length.
To help get the tolerances right I used the test gauge design.
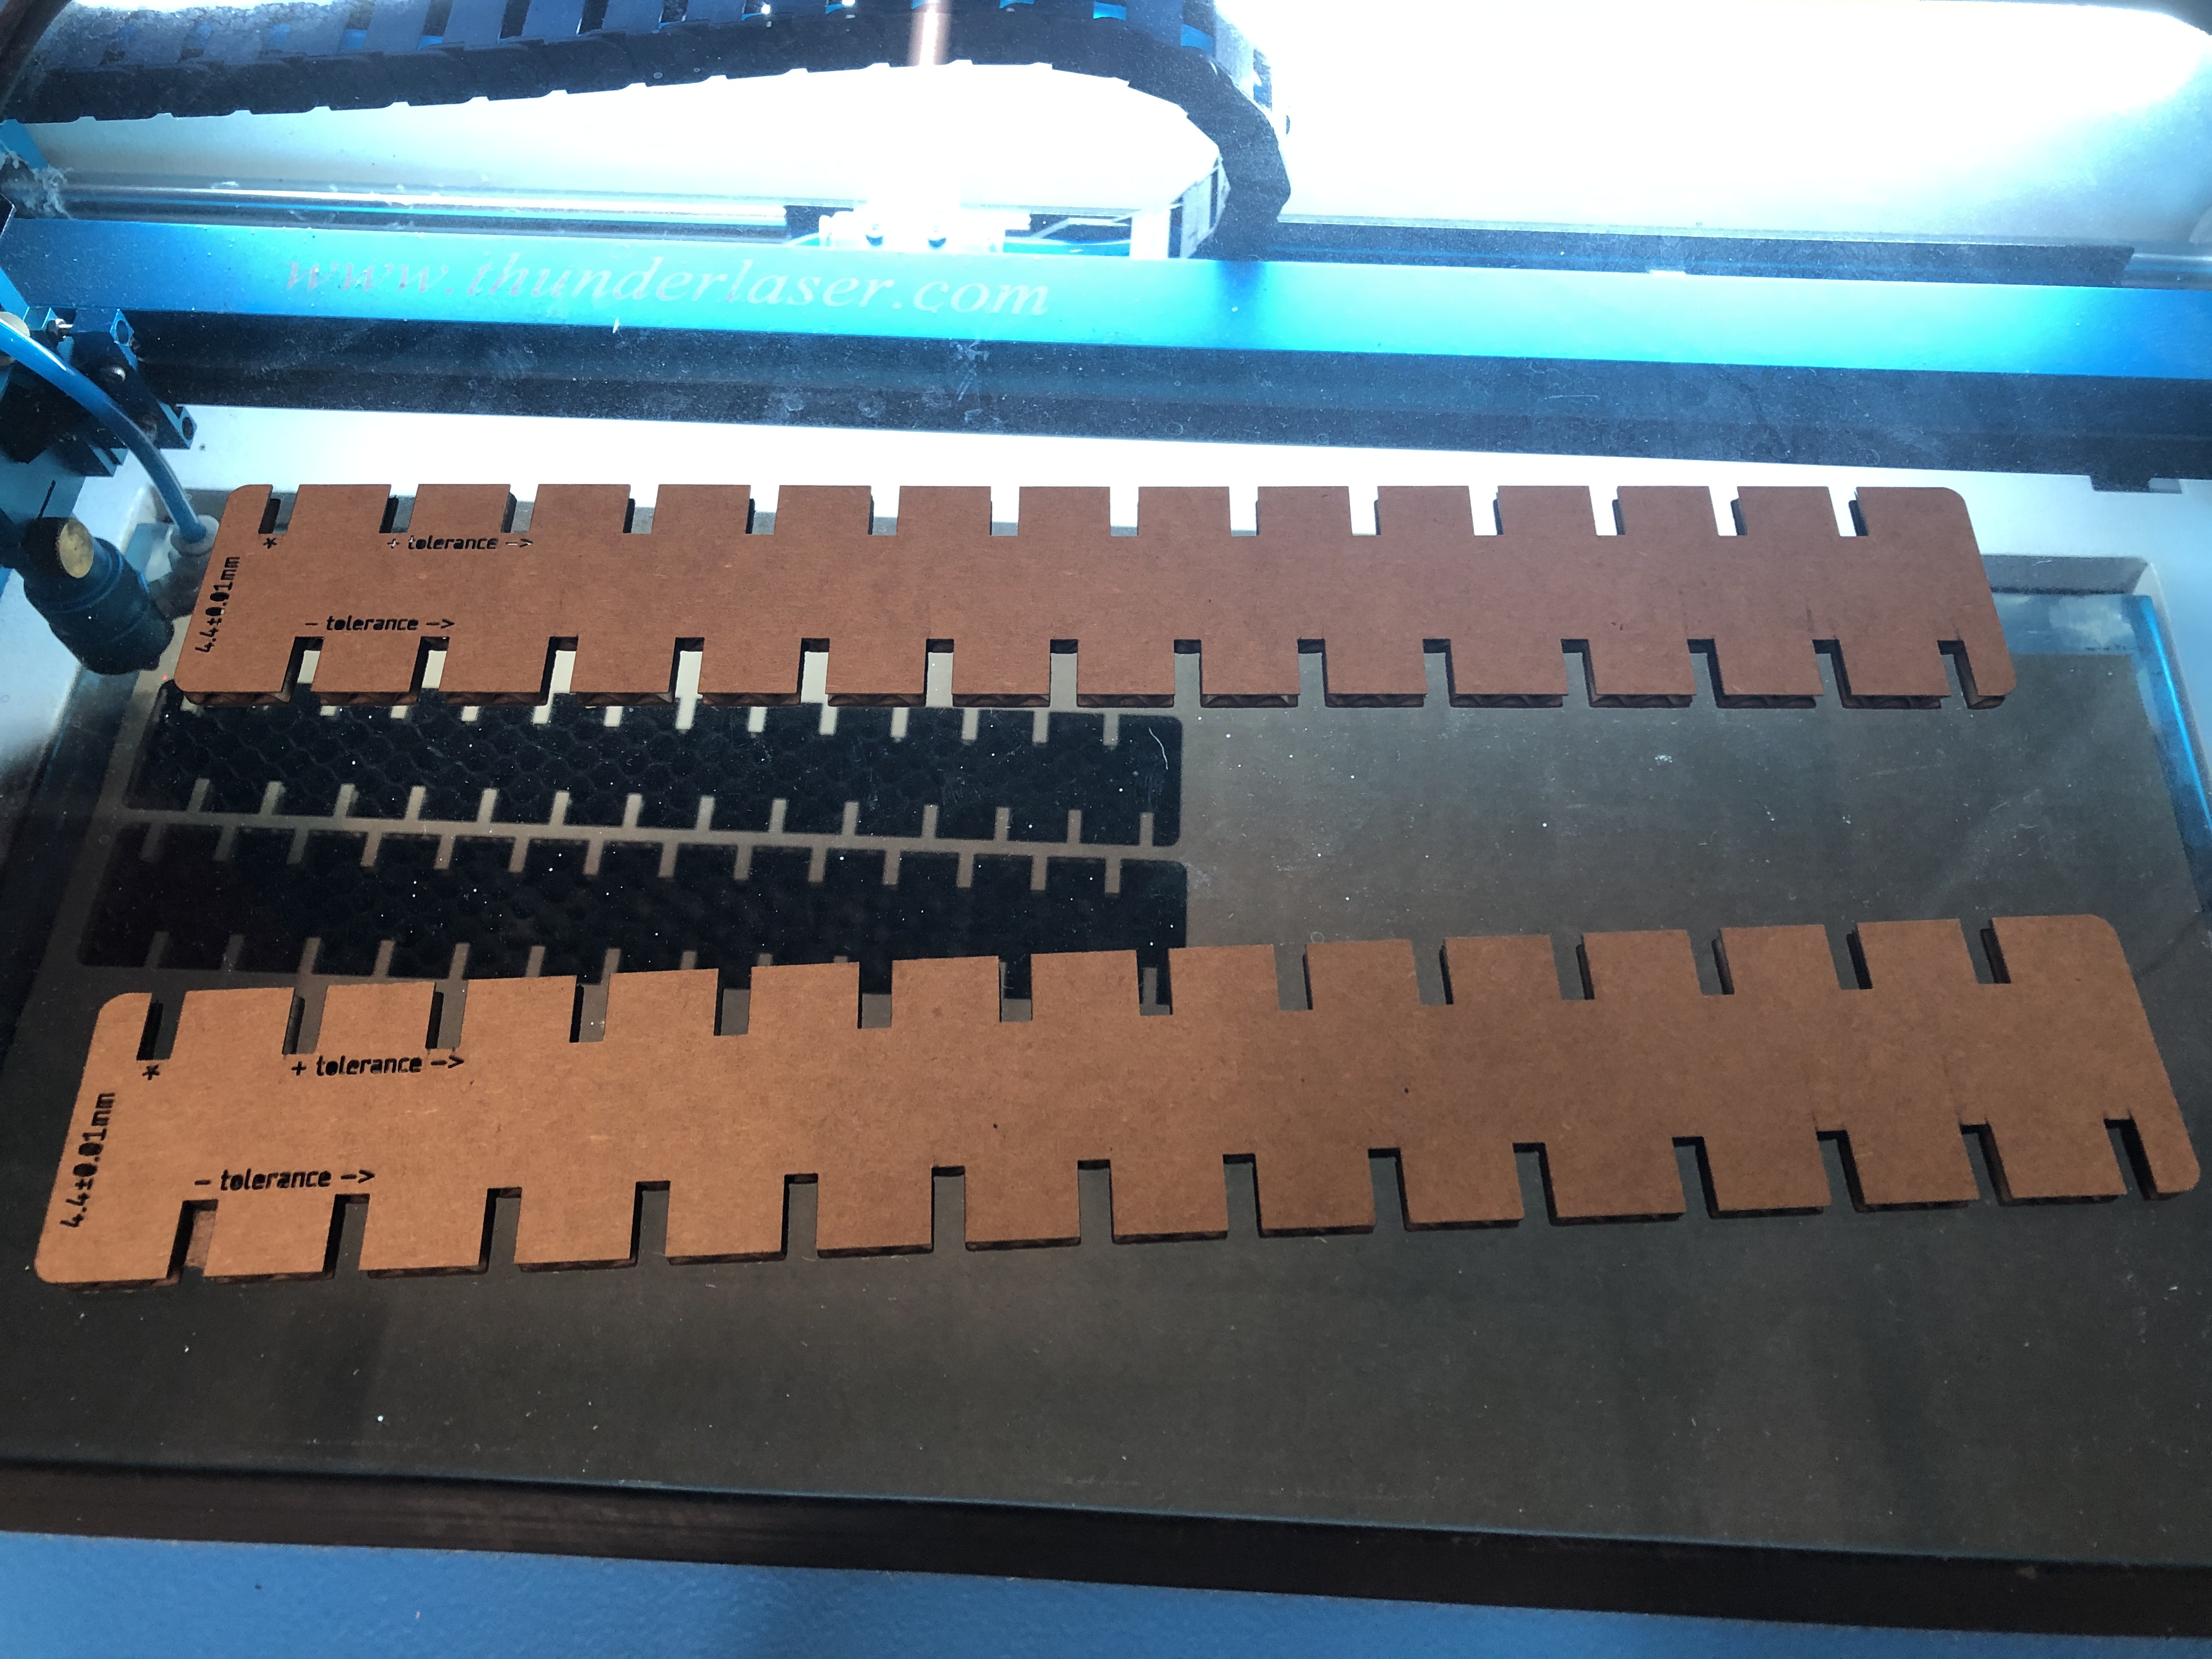
Unfortunately I found that the stock cardboard is not as regular as I had hoped and the tolerances were too loose at first.
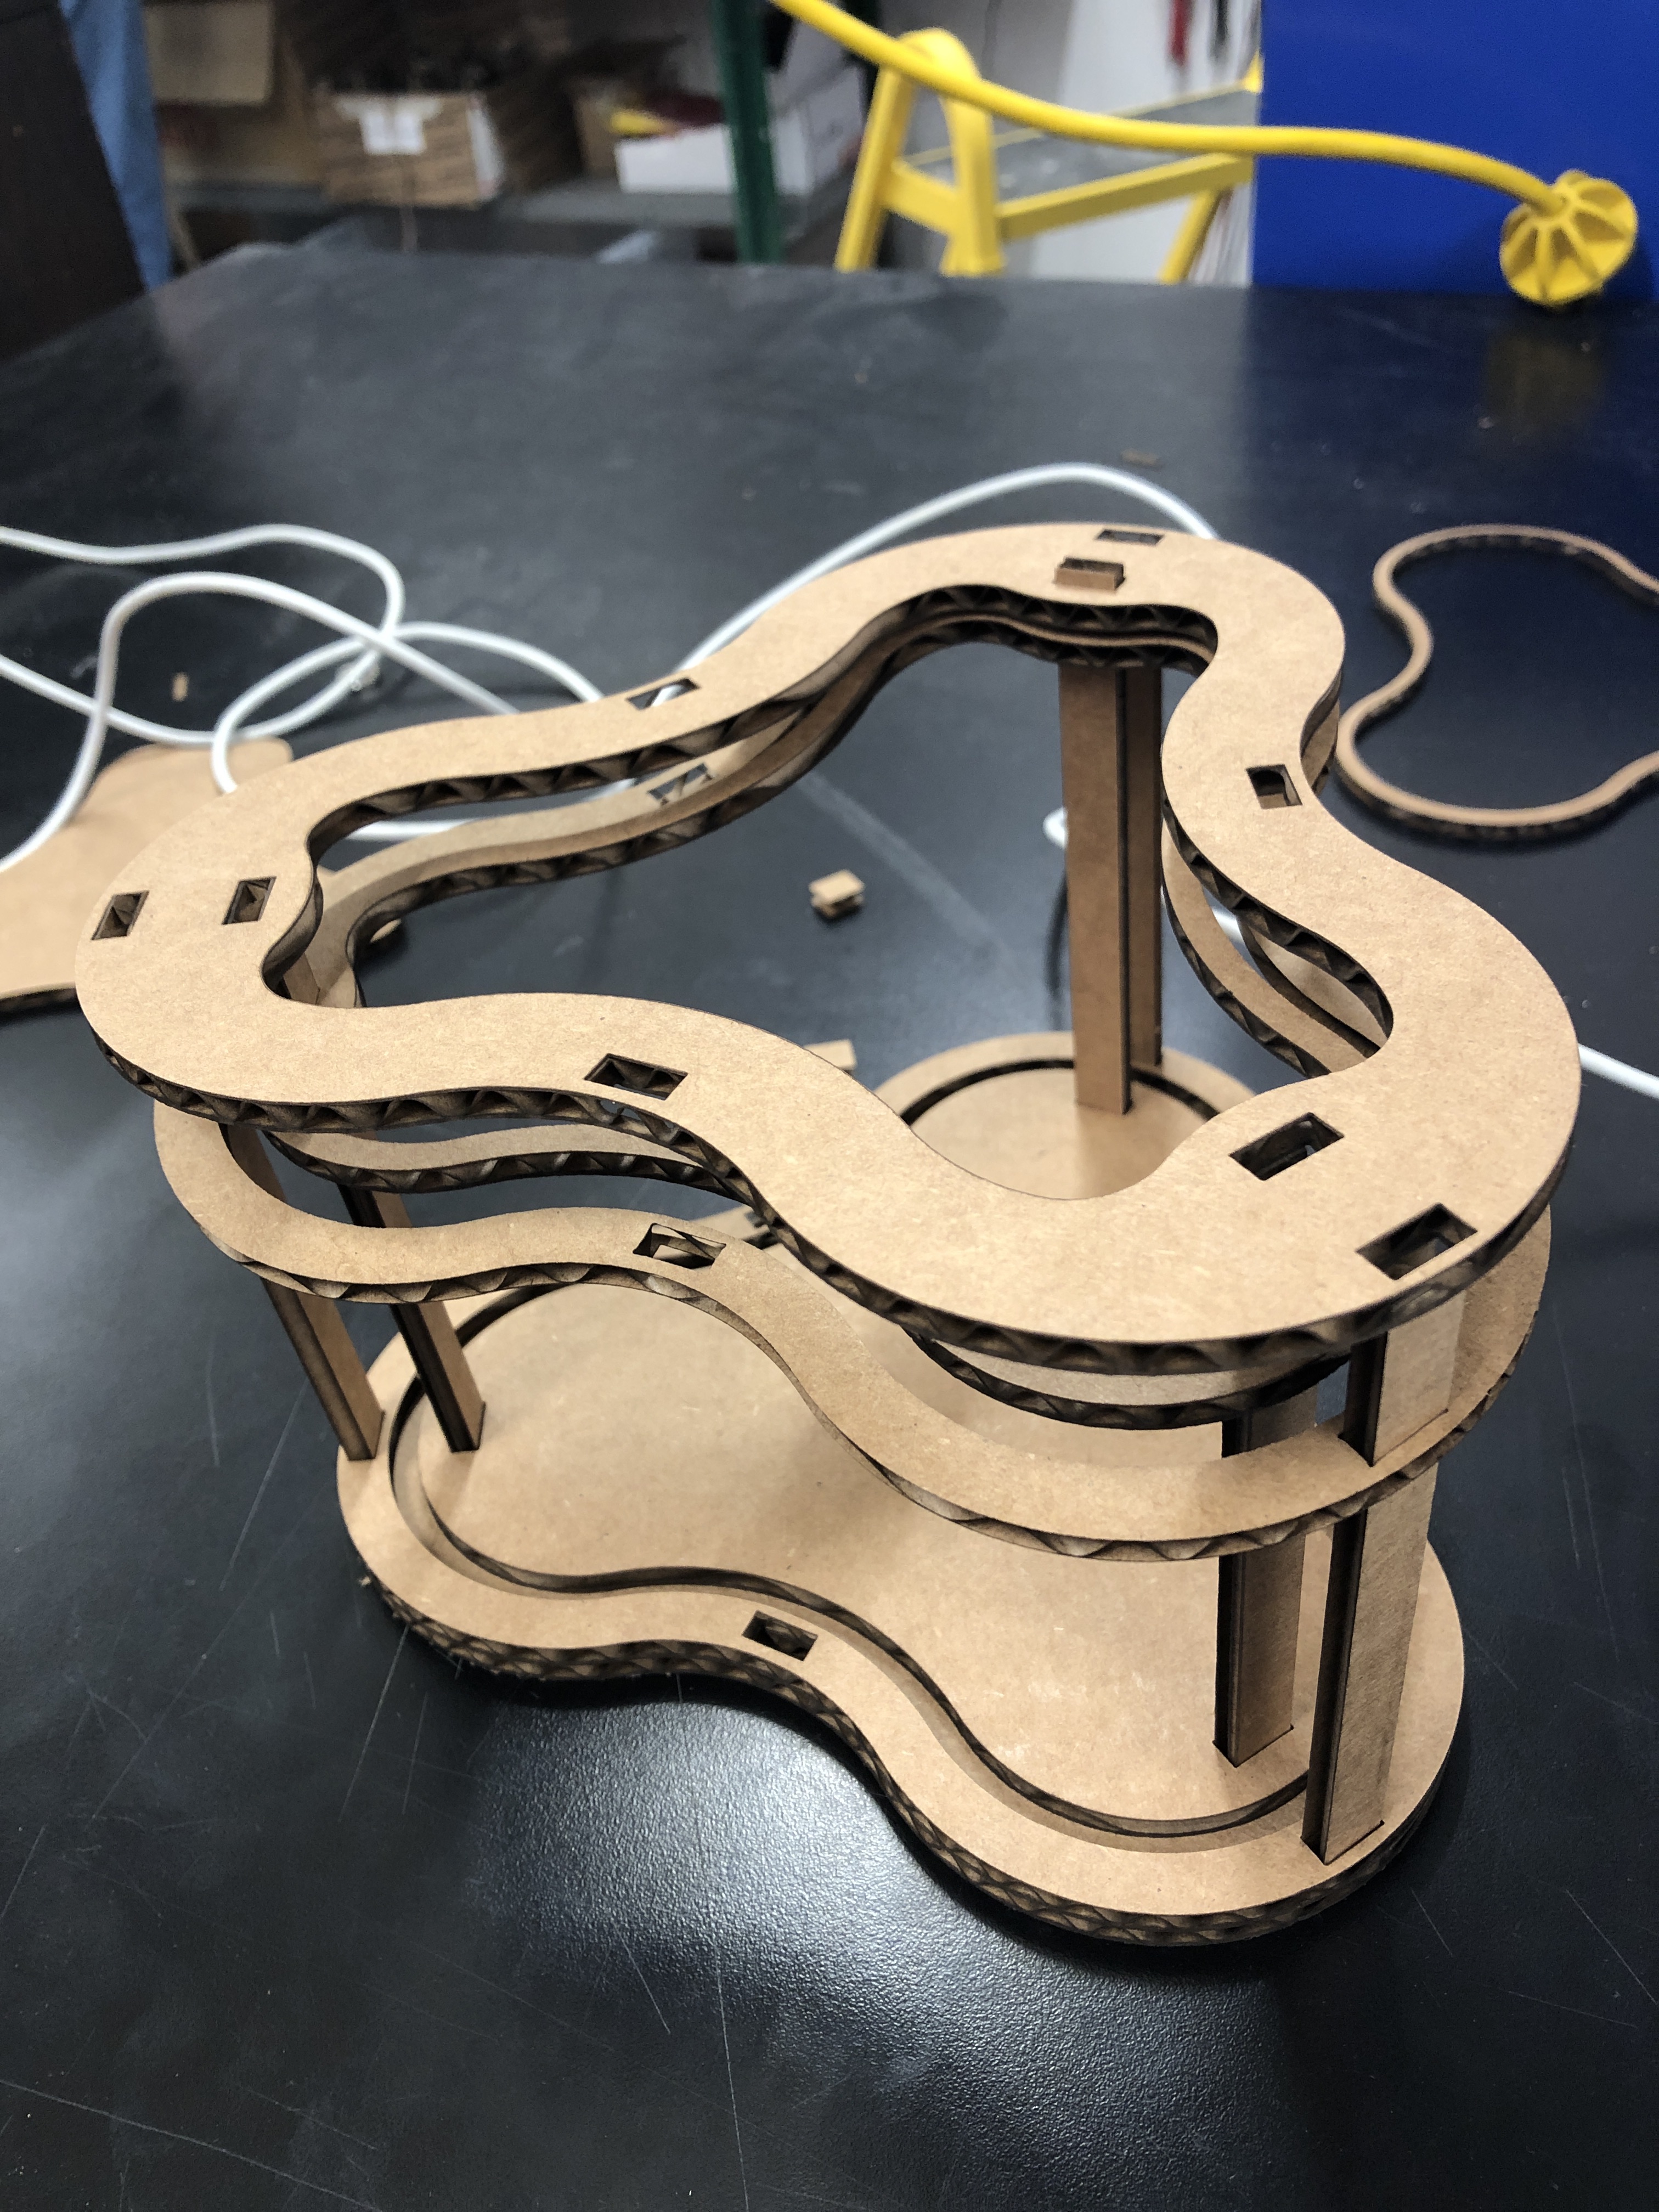
After adjusting the tolerances, everything fit together:
The 3D design file is here.
(and I learned how to make gifs from movs:)
ffmpeg -i in.mov -s 600x400 -pix_fmt rgb24 -r 10 -f gif - | gifsicle --optimize=3 --delay=3 > out.gif